Photographing a model on-location: the progression of an idea
As often happens for me when working a model on location, the final photographs are the result of a progression of an idea, rather than a fully-formed idea from the start. That colorful background came to be because of how I gelled for the flash. It’s a technique I’ve shown a few times, and here it helped me in bringing a blah scenario up to something more eye-catching.
The idea is to create an interesting shift in the color balance between your subject and background. It works especially well if the background is not that colorful and you need to create a more dramatic photo. Let’s run through the thought-process with this sequence of images:

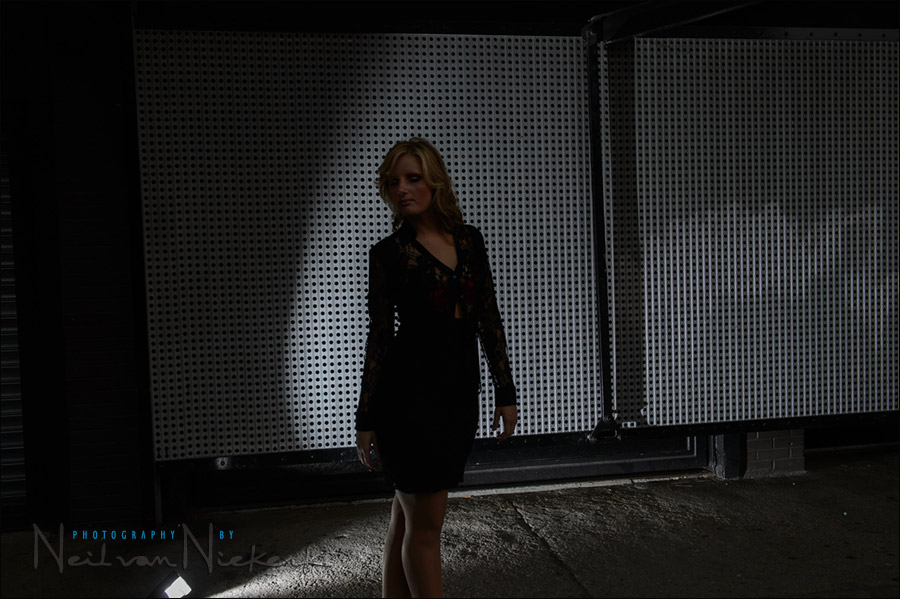
The progression started with this metallic grille that I noticed agains the one shop-front in Manhattan. It seems like there should be “something” there to use for the photo. This is the ambient-only test shot. (Nicole was caught mid-pose here, hence the awkward photo. Sorry!) This was the only test shot I took with ambient light only, to convince myself that I’d have to do something to juice this up.
Btw, Nicole is a model I noticed at one of the After Dark Edu events, but never got to photograph at the time. So when she visited New York, I was happy to meet up with her for a photo shoot.
Using an off-camera speedlight in a softbox, made the image more dynamic. But it was still too monotone for my liking.
Then similarly to how I added a direct speedlight to the background to create a sweet of light with these two shoots:
– review: Canon ST-E3-RT and Canon 600EX-RT speedlites (model: Molly K)
– gelling my flash for effect (model: Bethany)
… I decided to do the same here.
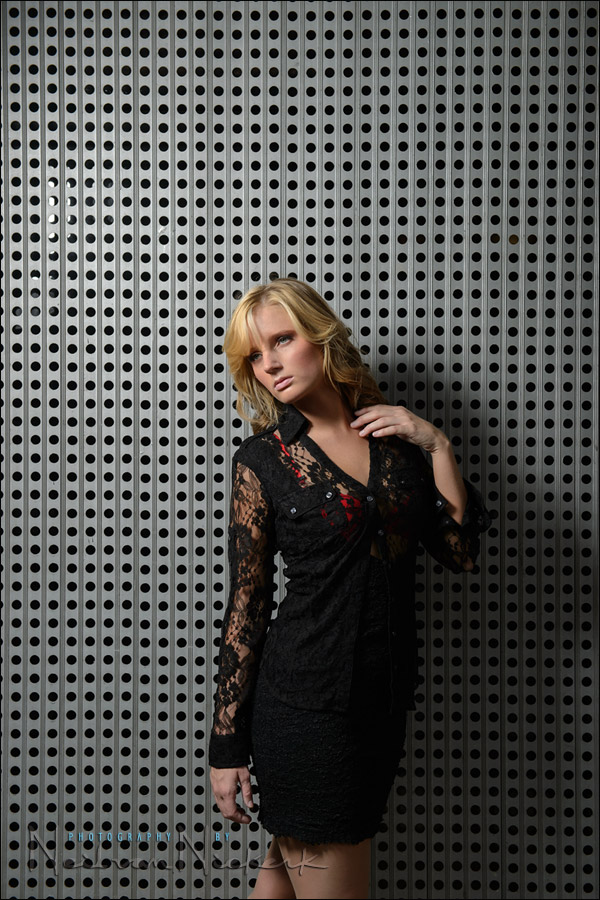
This test shot worked. There was something happening there now. But, it was still too grey.

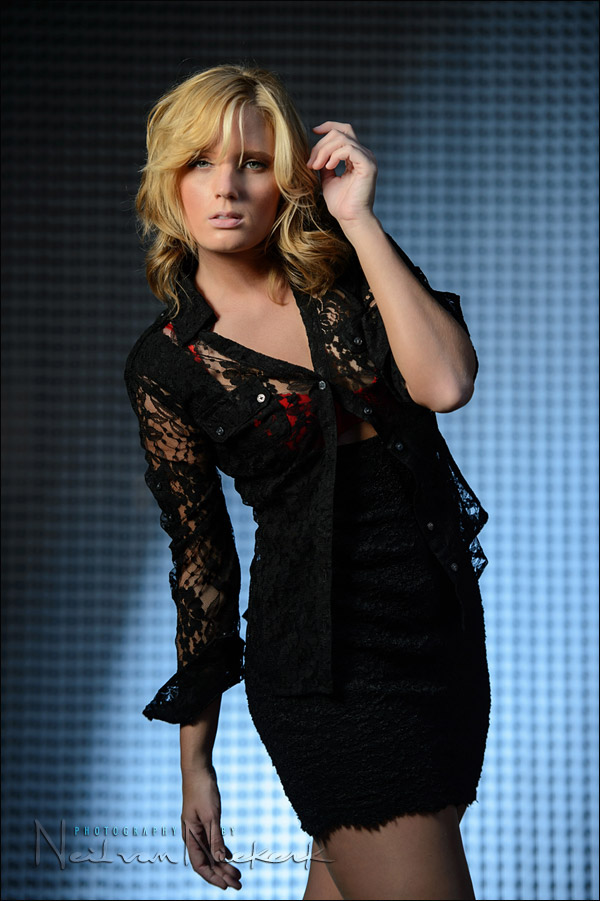
Then I decided that I could gel the flash on my main speedlight (in the softbox) with a 1/2 Straw CTS gel (affiliate). I changed my White Balance in my camera to 3700K to see what the effect would be on the non-gelled flash in the background.
With my camera set to 1/250 (to bring the ambient light way down), and an aperture of f/5.6 (at 200 ISO), the holes in the background appeared too sharply defined.
A change in aperture to f/2.8 and asking Nicole to step forward a little bit, radically changed the way the holes in the background appeared.
The main speedlight was in my usual Lastolite EZYBOX Softbox (24″x24″) (affiliate). It was held up on a monopod by Andrew Kufahl who kindly assisted us on the day. (Check out his photography – he has some very interesting work.) For this photograph, I wanted the light fall-off to the bottom half of the photo, so I asked Andrew to feathering the light, by holding the softbox at an upward angle. This does mean her hand and legs have a colder tone.
Relying on a technique I’ve used before – gelling my flash for effect – I could quickly turn a bland scenario into something with more pop.
Gelling your flash

Photo gear (or equivalents) used during this photo session:
- Nikon D4
- Nikon 70-200mm f2.8 AF-S VR II / Canon EF 70-200mm f/2.8L IS II
- Nikon SB-910 Speedlight controlled by PocketWizard FlexTT5 & AC3 Controller
or alternately, the Canon 600EX-RT Speedlite controlled by Canon ST-E3 Transmitter - Lastolite EZYBOX Softbox (24″x24″)
Related articles
- Gelling my flash for effect (model: Bethany)
- Gelling your flash for effect – blue background (model: Anelisa)
- Turning day into night (Laura & Todd)
I always learn so much from your blog posts. You make every progression logical and straightforward, and your results encourage me to try it, too. Thanks for letting everyone have what feels like a real-time peek into your thought process.
Neil,
I was wondering what your thoughts are regarding shifting your white balance to incandescent, in camera, and then (perhaps heavily) gelling your flash with CTO gels for the subject to get them back to neutral (or slightly warm) — versus — using CTB gels on the background elements, and leaving the subject neutrally lit by the flash (or only using a modest amount of CTO gels for the subject)?
I am assuming it has a lot to do with your background and how much control you have over it (like being outside in an open space or being inside in a confined space), but what do you think of the subtle effects either method has on coloration or tonality?
Thanks!
Kyle .. I think you mis-understood what I did here. I didn’t use CTB on the background.
I used a 1/2 CTS on my model, and that shifted the background to blue, relative to the near-incandescent White Balance on my subject.
One could play around with various gels, but I usually only have 1/2 CTS and CTS on me as a default.
Hi Neil, how are you mounting the flash onto the Lasolite cold shoe bracket with the Pocketwizard in there as well? I am under the impression that the extra height would cause problems with getting the flash into the opening of the softbox. Am I wrong?
Since the PocketWizard flash triggers elevate the speedlight too high for the regular bracket (or lollipop) holding the actual softbox, you will need the Lastolite hotshoe mark2 bracket to bring the flash and trigger to the correct height for the throat of the softbox.
Beautiful shot and a wonderful walk through. Makes perfect sense and makes me want to try this out for sure!
Thanks for all the detail including the little gem on” step forward and opened my f stop from 5.6 to 2.8″
Brilliant!
Hi Neil
I love this article and am seeking to imitate the result (imitation being the highest form of flattery!) but I’m just wondering how you specifically go about ensuring that the the output from the flash in the softbox doesn’t neutralise the colour in the gelled flash behind the model. I image that it has to affect it in some degree but wonder what settings ensure that the colour in the background isn’t totally washed out. Is it the ratio of the flash output or even the angle of the light provided by the softbox? I love that simple way in which you blurred the background in the final image!
Roy … it has to do with how close the softbox is to your subject, compared to the background. In this case there was enough separation between her and the background … especially after I moved her forward, to get the background more out of focus.
I have to add, that there isn’t a specifically scientific process at work here … just a general idea of what to expect, and working with that. So I can’t really give you a formula here, aside from the general thought-process.
Neil,is this ettl or manual? Haven’t figured out how the pre-flash for ettl works with the softbox.
This was Manual flash. It’s easier to get consistency this way, if your subject and flash are fixed in position.