Wedding photography posing tips – For variety, make slight changes
Wedding photography often feels like a sustained burst of stressful periods – the processional (where you have a really limited range to nail everything in low light), the family photos (where you have to gain control over a potentially chaotic situation), and the romantic portrait session with the bride and groom. Even with a couple as cool as Jackie and Todd, there is still the pressure to get photos as awesome as the images you show in your portfolio. The time is usually limited, and you have to nail the lighting, and the posing of the bride and groom.
I work according to a loose system when I photograph the romantic portraits – a way to make sure I get variety, and still shoot fast enough. The two pairs of photos shown in this article, will help to explain how I work.
1.) Keep it relaxed – loosely pose the couple
When posing a couple, I loosely pose them. There’s no way I would rigidly pose them according to a structured ‘flow posing’ method. We need to take their personalities (and body types), and the way they interact with one another, into account.
The starting point – have the couple snuggling or touching in a relaxed way – then adjust the pose. Once you have the first pose that works, from there you need to shoot from different angles.
2.) Shooting every pose with variety
Have this algorithm in mind, and shoot this fast so you don’t lose momentum or the couple’s energy:
- Shoot wide, medium & tight.
- Vertical, horizontal.
- Off-center compositions.
- Shoot from other angles, such as over her shoulder, or over his shoulder.
This shooting rhythm is something I keep for every place or background where we shoot a new pose or setup. There are a variety of shots we can do out of any single pose, just by shooting with that pattern. Wide, medium, tight. Vertical, horizontal. Off-center. Different directions.
3.) Change the poses with economy of movement
This is really the point that I want to stress. With every setting or background where you pose the couple – don’ just do one pose. You can make slight changes to the pose to give variety. The key here is economy of movement. For example, change how the groom’s hand rests on the bride’s arm or shoulder. Rotate one of them. Have them lean in. Slight changes. There’s variety here! Then still shoot every change with most of the algorithm mentioned – wide, medium, vertical, horizontal, off-center, different angles.
With this, it is so much easier to give the couple some variety in their romantic portraits.
4. More tips on posing the bride and groom
Romantic wedding portraits are more than “just kiss”. Don’t fall into the routine of telling the couple to look at the camera, “and now kiss”, before moving onto the next place. Your work isn’t done there – you can still change the pose up, and shoot with variety in mind.
Adjust a pose with incremental changes – look closely, and fix things in the pose that need changing. For example, the position of their hands.
Asymmetry – pose with asymmetry in mind. That creates a more dynamic balance to the pose.
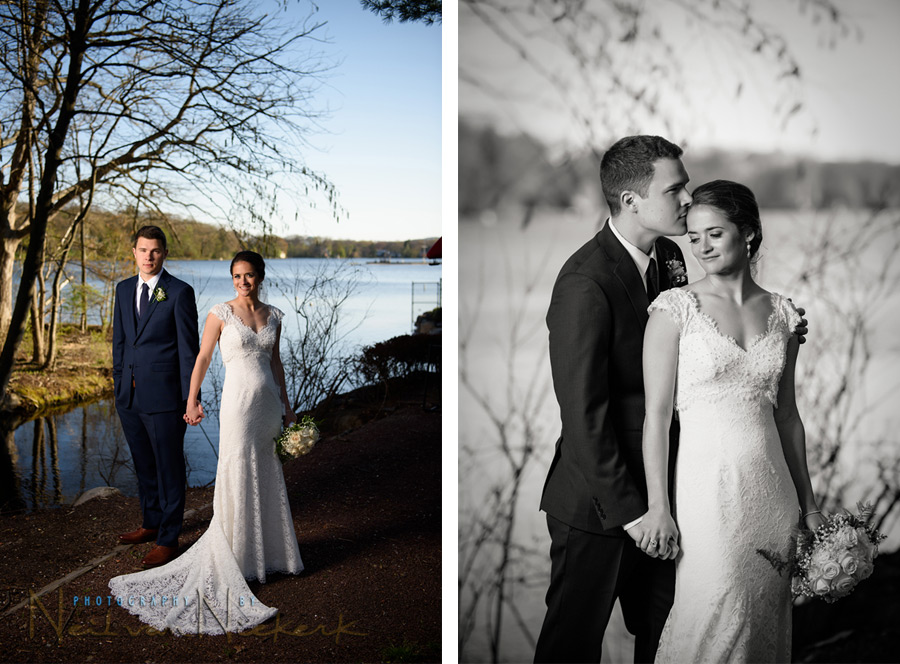
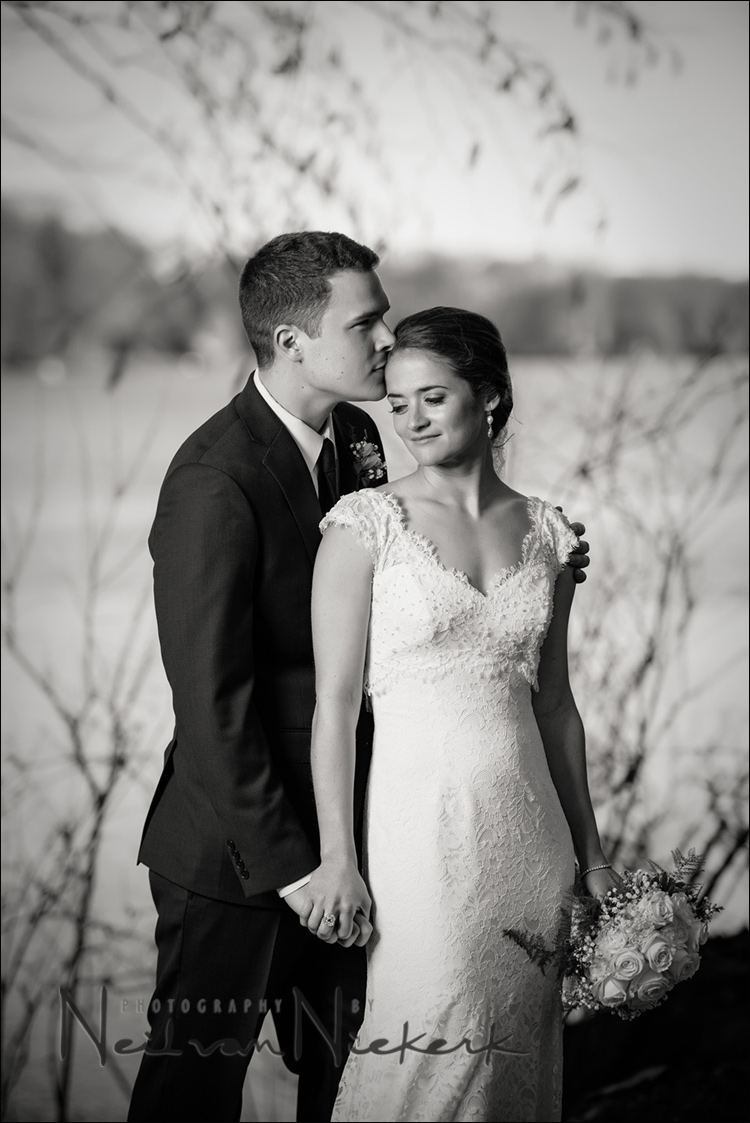
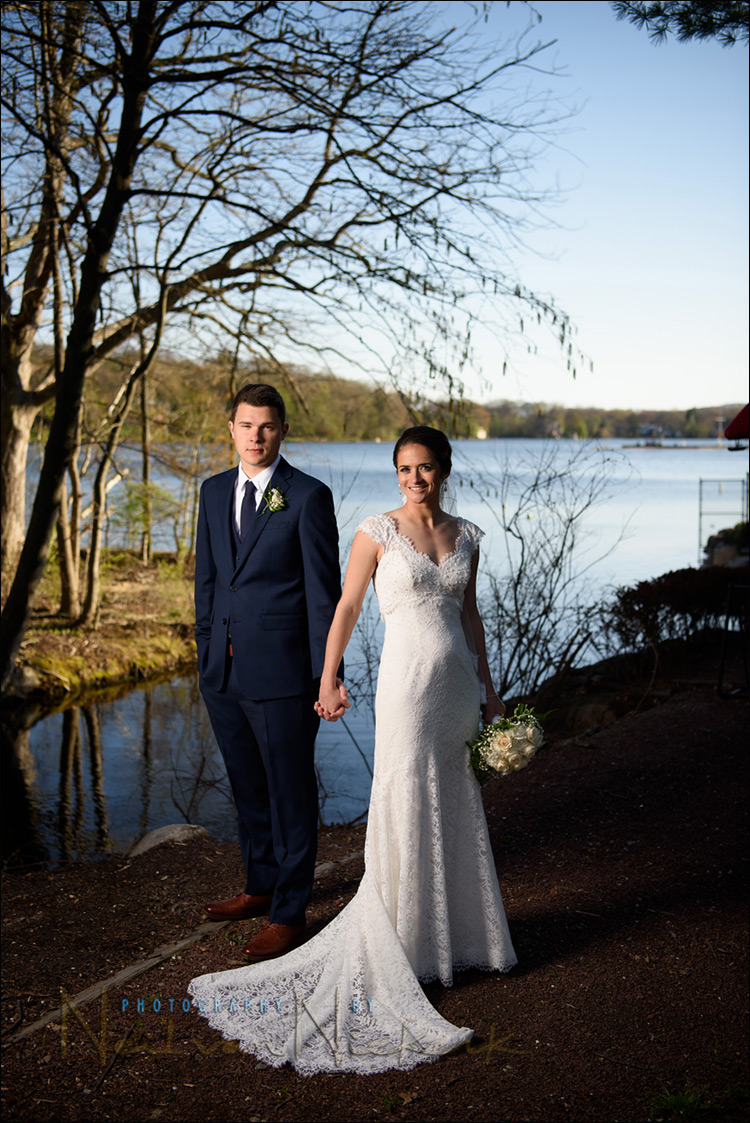
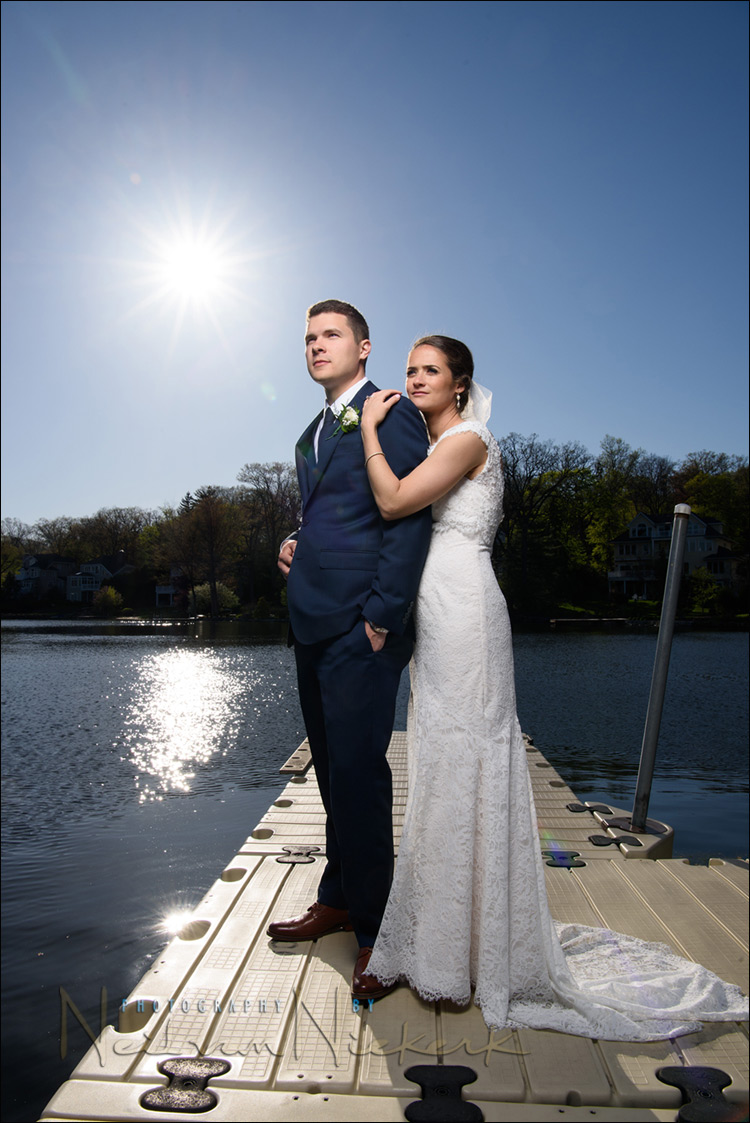
Comparing these two photos, you can see that Jackie didn’t change her pose much. Todd rotated, and changed his hands. In-between these two poses, there were other possibilities too. I also swapped cameras between the two images – one camera has the 24-7omm f/2.8 zoom, and the other has the 70-200mm f/2.8 zoom. These two lenses are my workhorse lenses with weddings, and I cover more than 95% of the day with these.
- Camera settings for both images: 1/1000 @ f/3.2 @ 100 ISO
- LH: 24-70mm @ 45mm
- RH: 70-2oomm @ 135mm
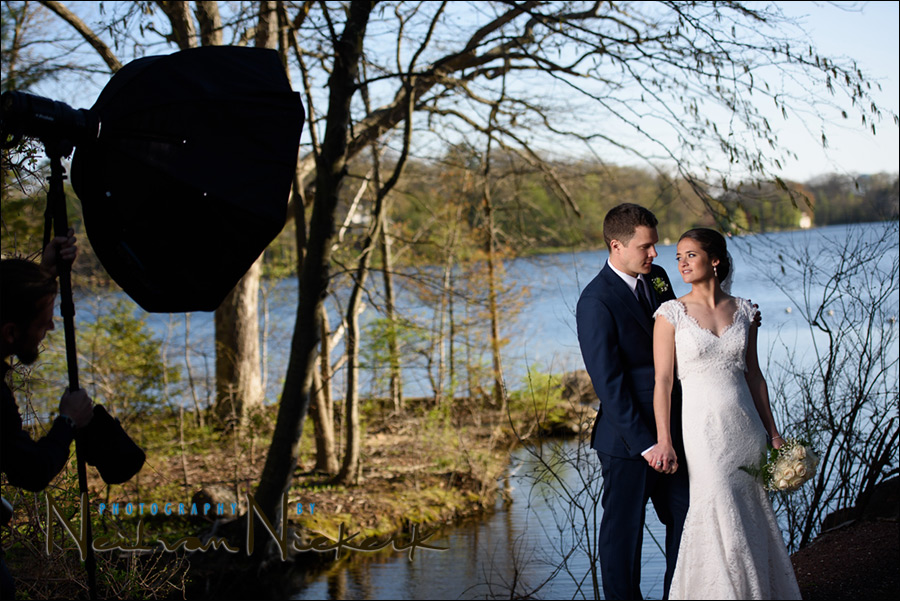
This pull-back shot shows the lighting used here (and for the other two images below.)
The light is the Profoto B1 flash (B&H / Amazon), which has proven to be a game-changer for me since I started using it. It allows me to usehigh-speed sync (to get the shallow DoF), but still use a softbox for flattering light. The softbox is the Westcott Rapid Box 36″ Octabox (B&H / Amazon), which is described in this article – best softbox for on-location headshot photography. This is a powerful combo!
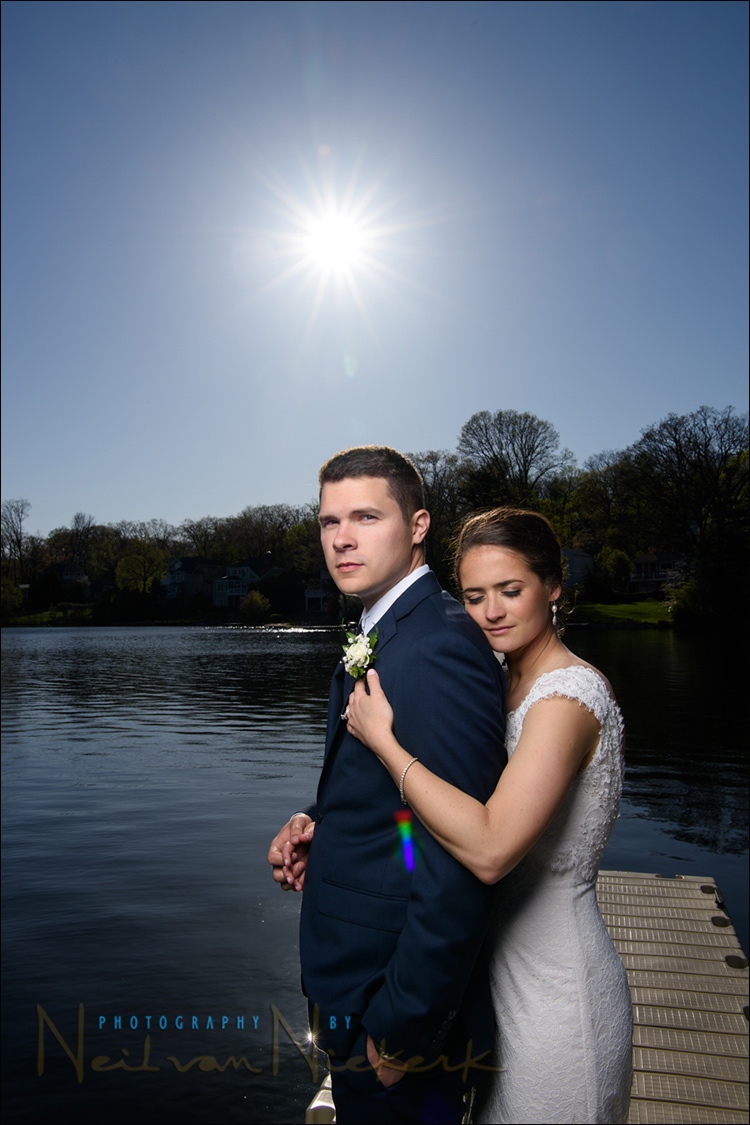
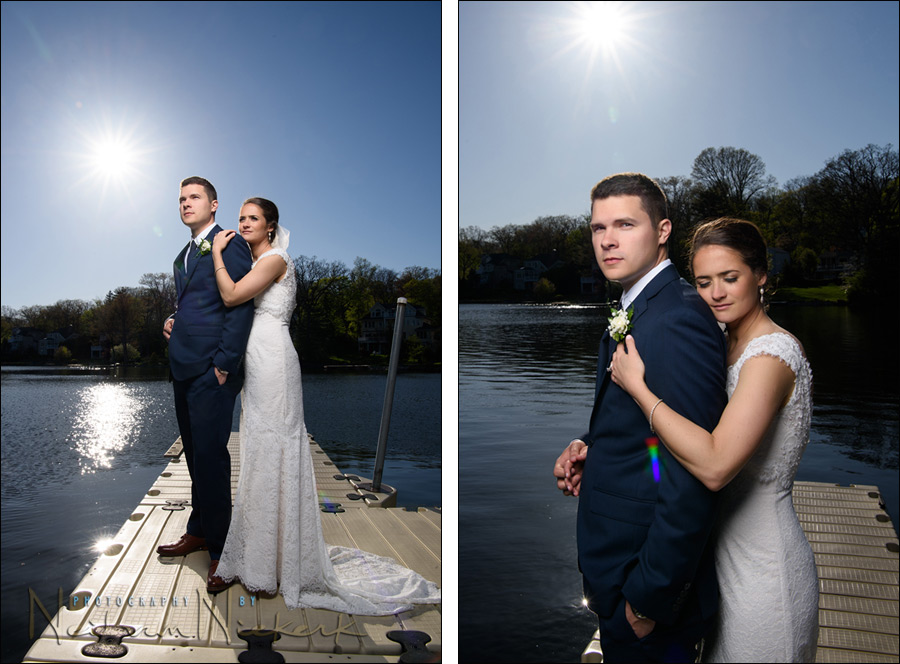
Comparing these two photos, you can see that Jackie slightly changed the position of her hand. I also asked them to change their gaze. In the first shot, they are looking away – a more epic pose. With Todd looking at the camera, and Jackie with her eyes closed and her head down slightly, the pose is sufficiently different. Slight changes with economy of movement! Then obviously, I shot wider and tighter.
- Camera settings for both images: 1/250 @ f/16 @ 100 ISO
- Both images shot with the Nikon 24-70mm f/2.8E VR, at 28mm.
- Lighting with the Profoto B1 flash, and
- Westcott Rapid Box 36″ Octabox (B&H / Amazon)
A little bit of homework
Why did I not go to high-speed flash sync with these last two images?
Summary
Working to a system like this, helps me keep the momentum of the photo session going, while still getting enough variety in the images.
I’m guessing because you were at full power on the flash? No real need for a shallow DOF on either of those photos anyway. 1/8000 @ f2.8 I think is the equivalent exposure, but then the flash would not expose them correctly due to putting out less power.
Is it because you wanted to keep a small aperture for the sun starburst effect therefore shutter speed didn’t need to go beyond sync speed ?
I agree with David. High f-stop for the Starburst.
That’s what I think. You can only get those starburst effects at smaller apertures
The 24-120mm f4 Nikor could have been a great alternative in this particular case. Opens a little less but since plenty of strobe power was used, and DOF didn’t need to be too shalow, it would have worked I guess.
You needed the flash to perform at its best, hence 1/250 results in max performance to compete the brigh sunlight and still use the softbox ?
I think you were able to obtain the ambient light look you wanted at 1/250, and since the Nikon can sync at that shutter speed there was no need for high speed sync. Your aperture gave you your sunburst effect.
Because that sun was pumping, and you needed f16 light coming out of your flash/strobe unit and that was most likely its limit. Any change for HSS would have lessened your power output and required the strobe to be closer to your subjects, which is probably something you couldn’t have done on those docks.
I’m guessing because you used an ND filter :)…
Ambient sunny 16 rule. ISO 100 1/100 sec at F16. You strobe at 1/250 effectively overpowering the sun by 1 stop. Best guess.
In part because the detailed ripple effect in the sun’s reflection in the water required the f/16 aperture.
No need for HPS because you stopped down to f16. So, a slower SS allowed for proper exposure
to get maximum power from the flash
Great results but man, that Profoto kit including remote and softbox is so expensive, verging on 3 grand !
Try and do it with speedlights, and add up the cost.