Available light portraits
A theme we have touched on regularly here is that “using the available light” is not a random decision. The best results with portrait photography in available light, is when we are deliberate. Deliberate in how we position our subject in relation to the light. This is the central idea in my book, Direction & Quality of Light – posing and lighting are inter-connected. With available light photography, it becomes a little harder to find light that is flattering – compared to using off-camera flash, where you can sweeten the light most of the time with the use of additional light. With available light, you have to be that more thoughtful about your approach.
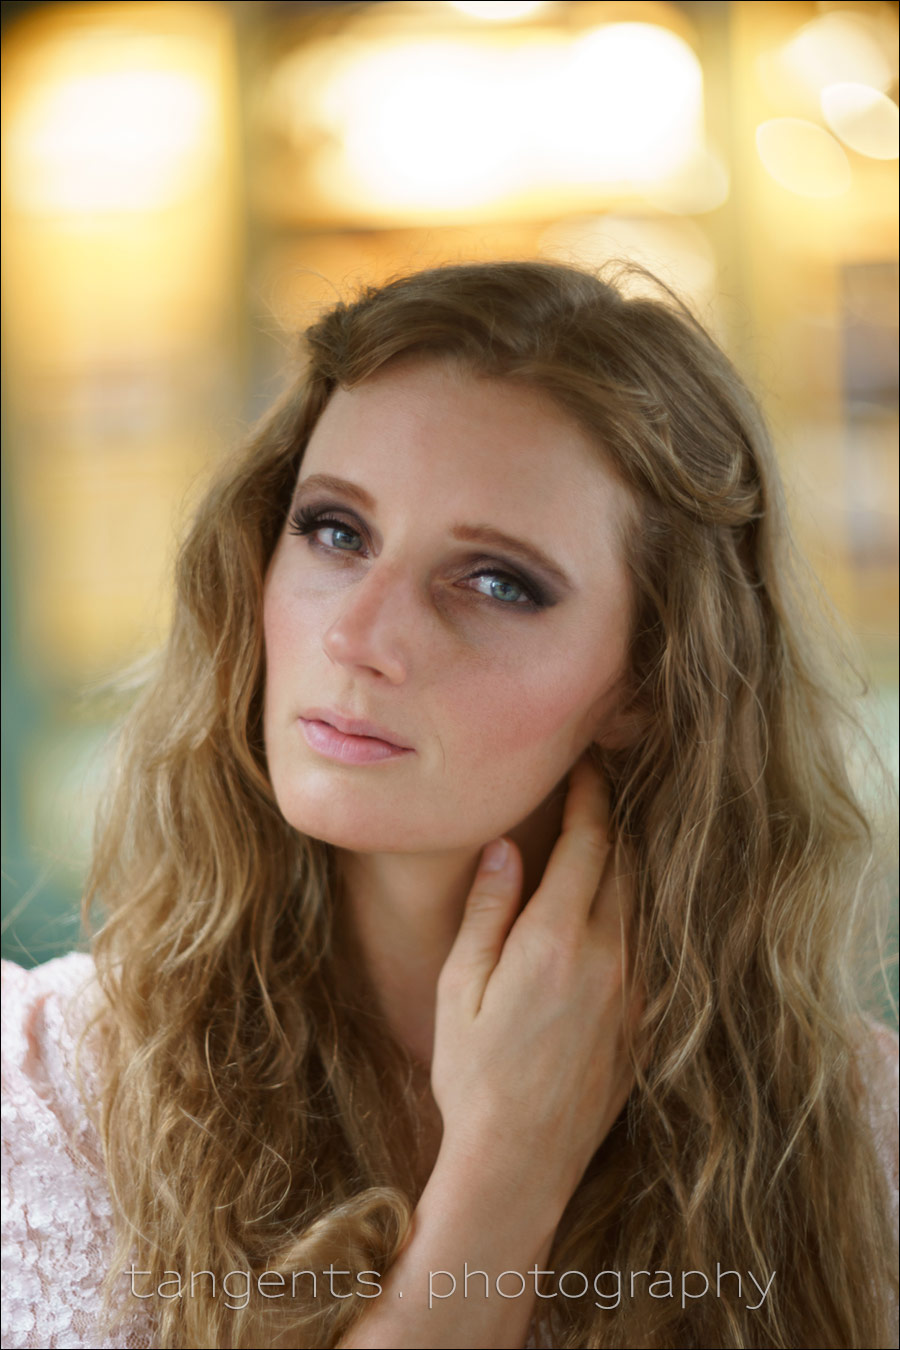
On this day in New York with a model, Nicole, the day was over-cast and rainy. While overcast light is soft, it isn’t usually flattering, because it is “top-heavy” and leaves the eyes darker than is ideal. From this photo session in New York, I want to show two examples where we only used the available light for portraits.
You will quickly notice the beautiful swirly bokeh of all the images shown here. The bokeh is typical of the specific vintage lens used, the Helios 85mm f/1.5 (Canon) / (Nikon) (B&H). It is actually an M42 screw mount, but I bought the one adapted for Nikon, and then used with an adapter on the Sony A7ii. As mentioned in the article, Sony mirrorless cameras with vintage lenses, the Sony mirrorless cameras are especially well suited for manual focus lenses. All photos were taken at the widest aperture, f/1.5
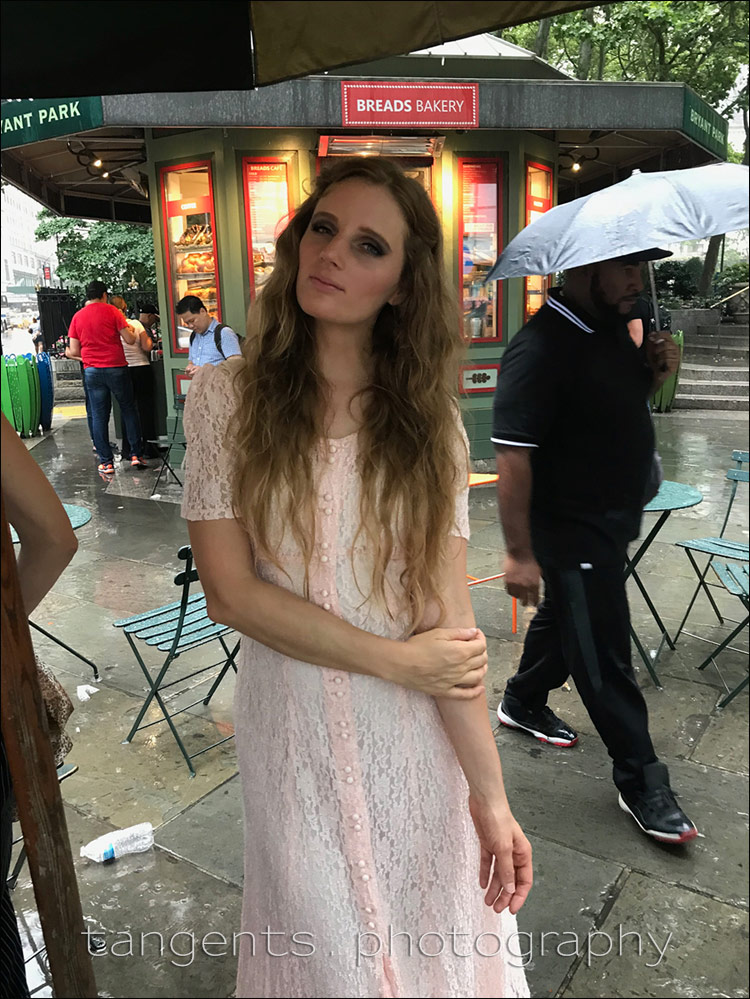
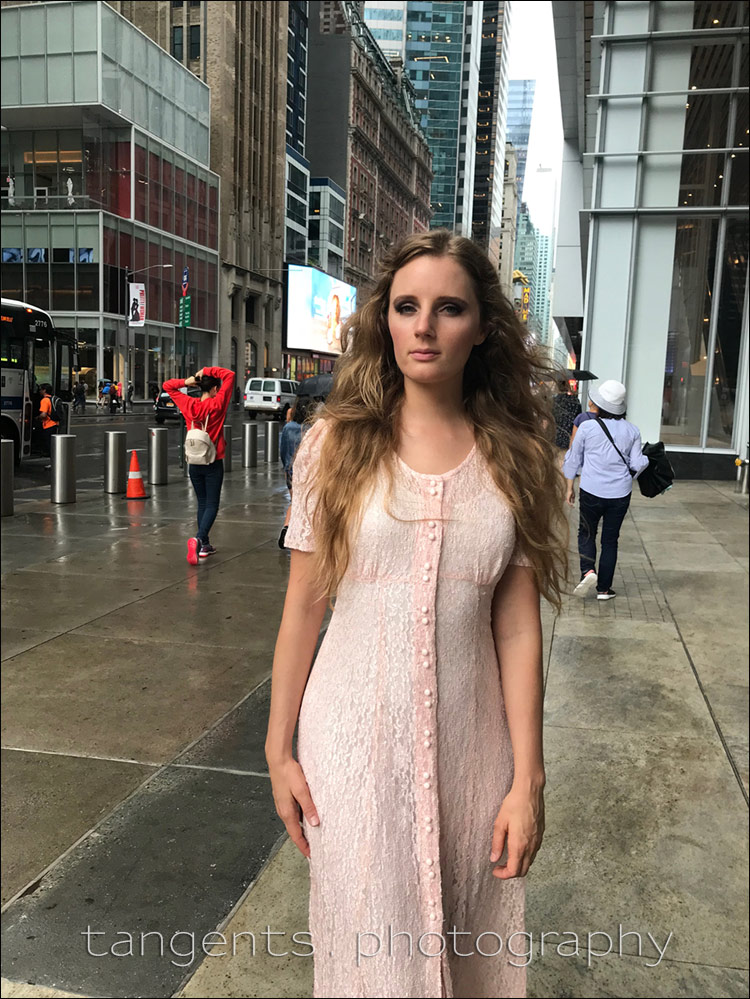
The light here is beautifully even, but that doesn’t quite explain where we were when we took the photos in this sequence. This pull-back shot taken with my iPhone will explain it better – we were trapped under a large umbrella in Bryant Park during a sudden downpour.
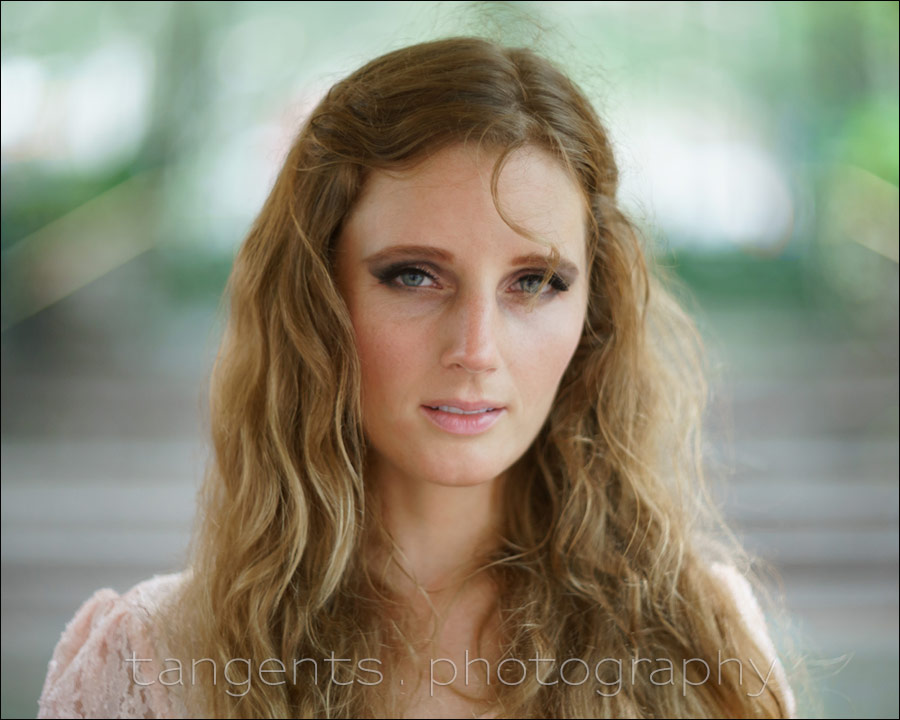
With Nicole’s back at the very edge under the umbrella, most of the light on her face came from the front. The canopy of the umbrella acted as a “flag” that blocks any light coming from above, like it would have if we had been working out in the open. You can get the same effect working on a porch or under a verandah, “forcing” the light to come from a more flattering angle.
In this image below, I kept the flaps of the umbrella in the frame to show where we were. A slightly tighter crop would then be the image to use.
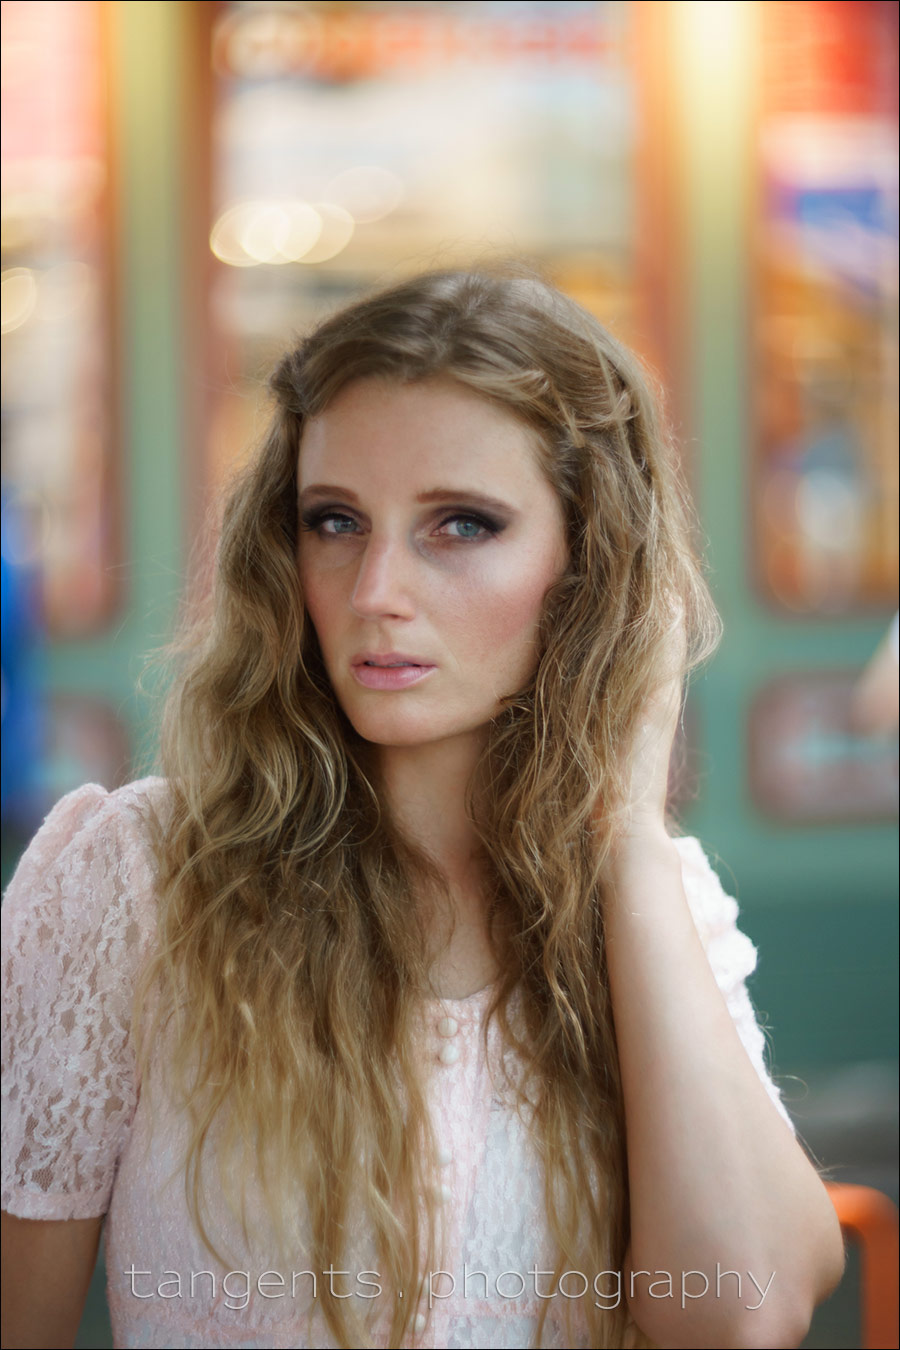
A slight change in my position would then give us different backgrounds, but always with the same flattering light on her. This really is a simple technique, once you know how to look for this kind of directional light.

Direction & Quality of Light
I wanted to distill the essence of what we, as photographers, work with – light! Before we can truly grasp on-camera flash and off-camera flash, and really, any kind of photography, we have to be aware of the direction and quality of light. We need to observe the light that we have, and then decide how best to use it, or enhance it.
With this book, I try my best to share those “aha!” moments with you, and I do believe this book can make a difference to your photography.
The book is available on Amazon USA and Amazon UK, or can be ordered through Barnes & Nobles and other bookstores. The book is also available on the Apple iBook Store, as well as Amazon Kindle.
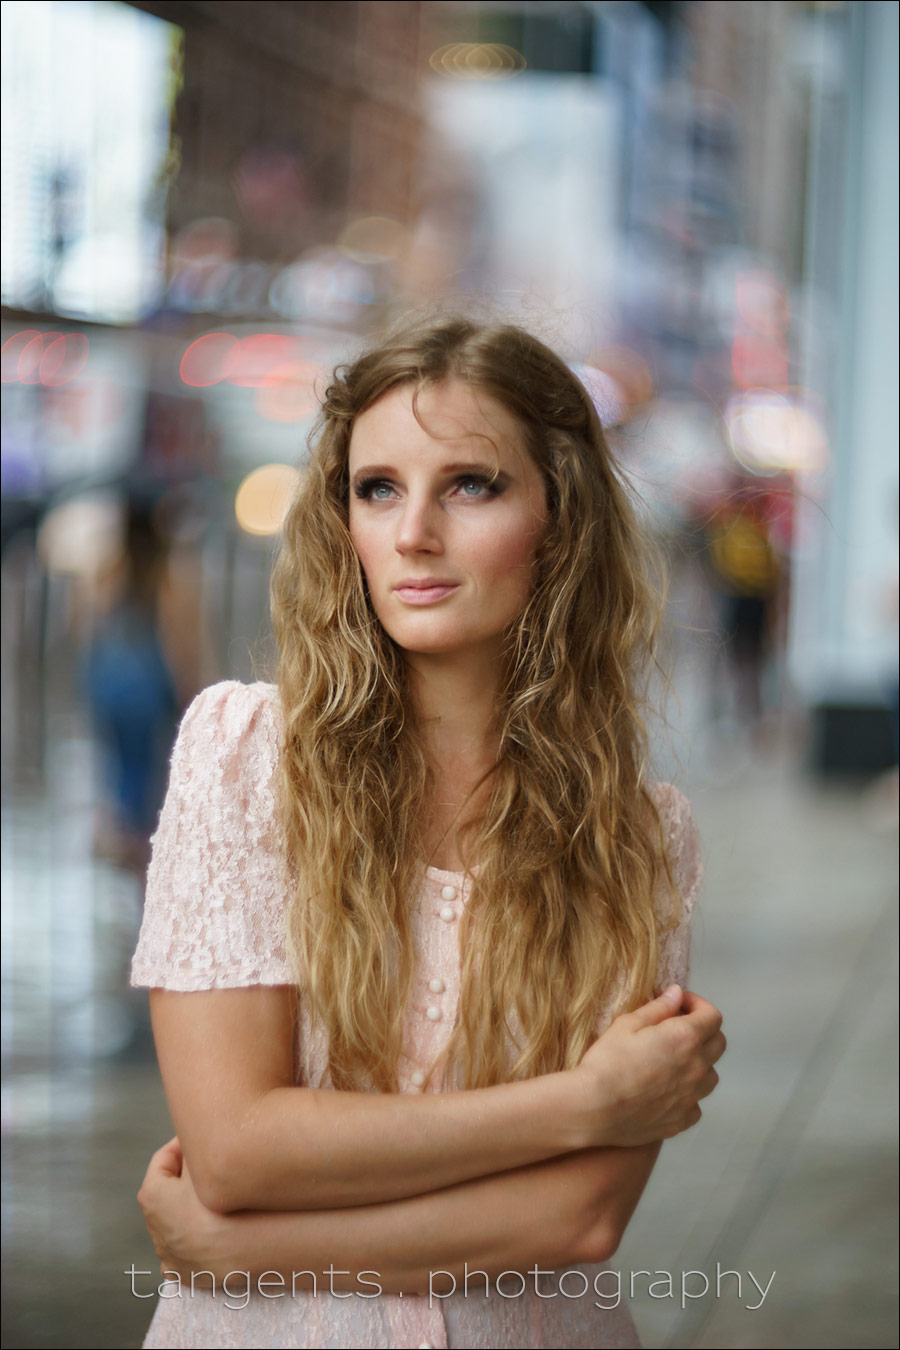
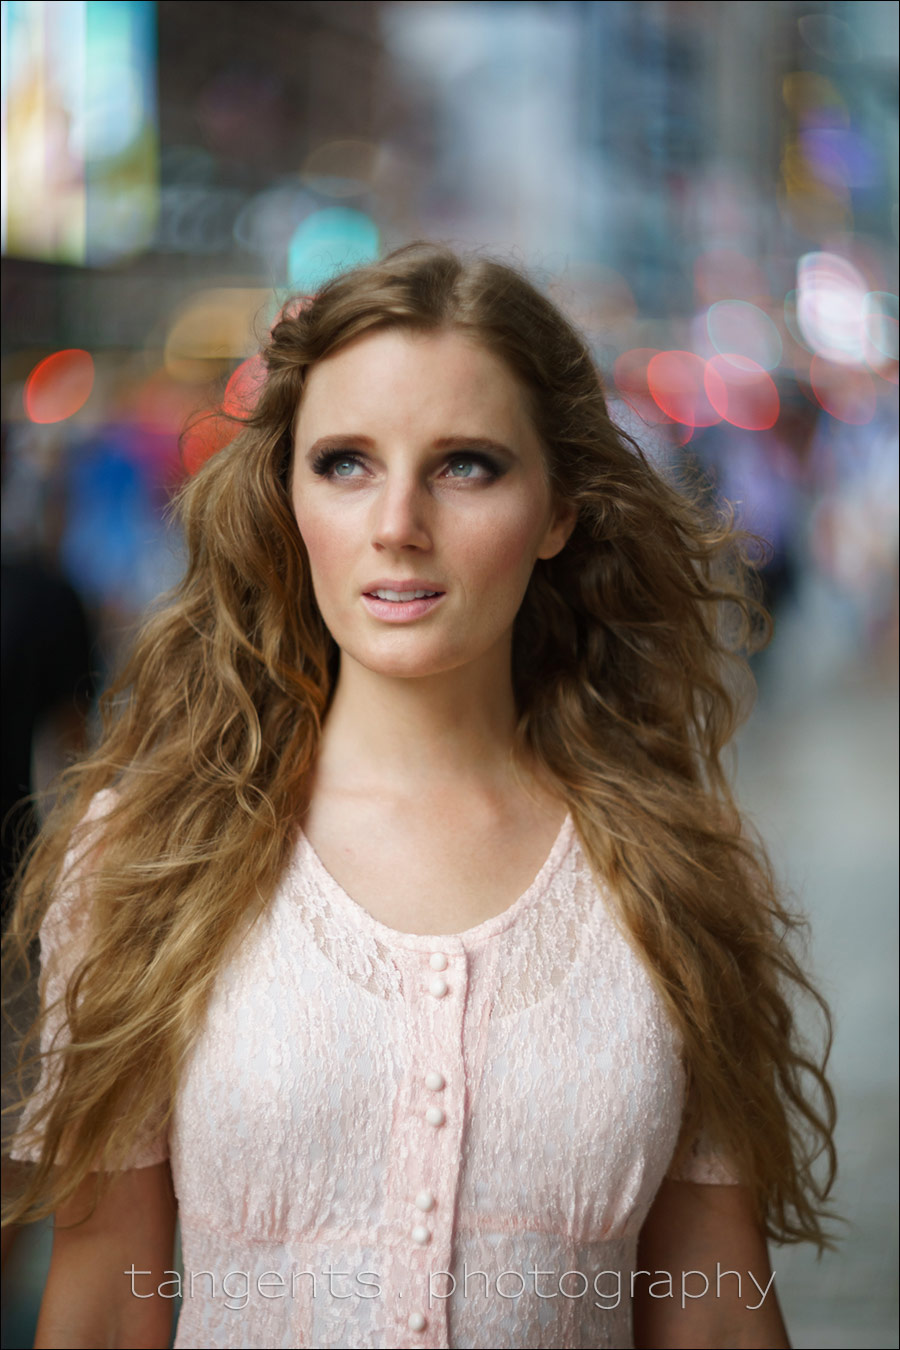
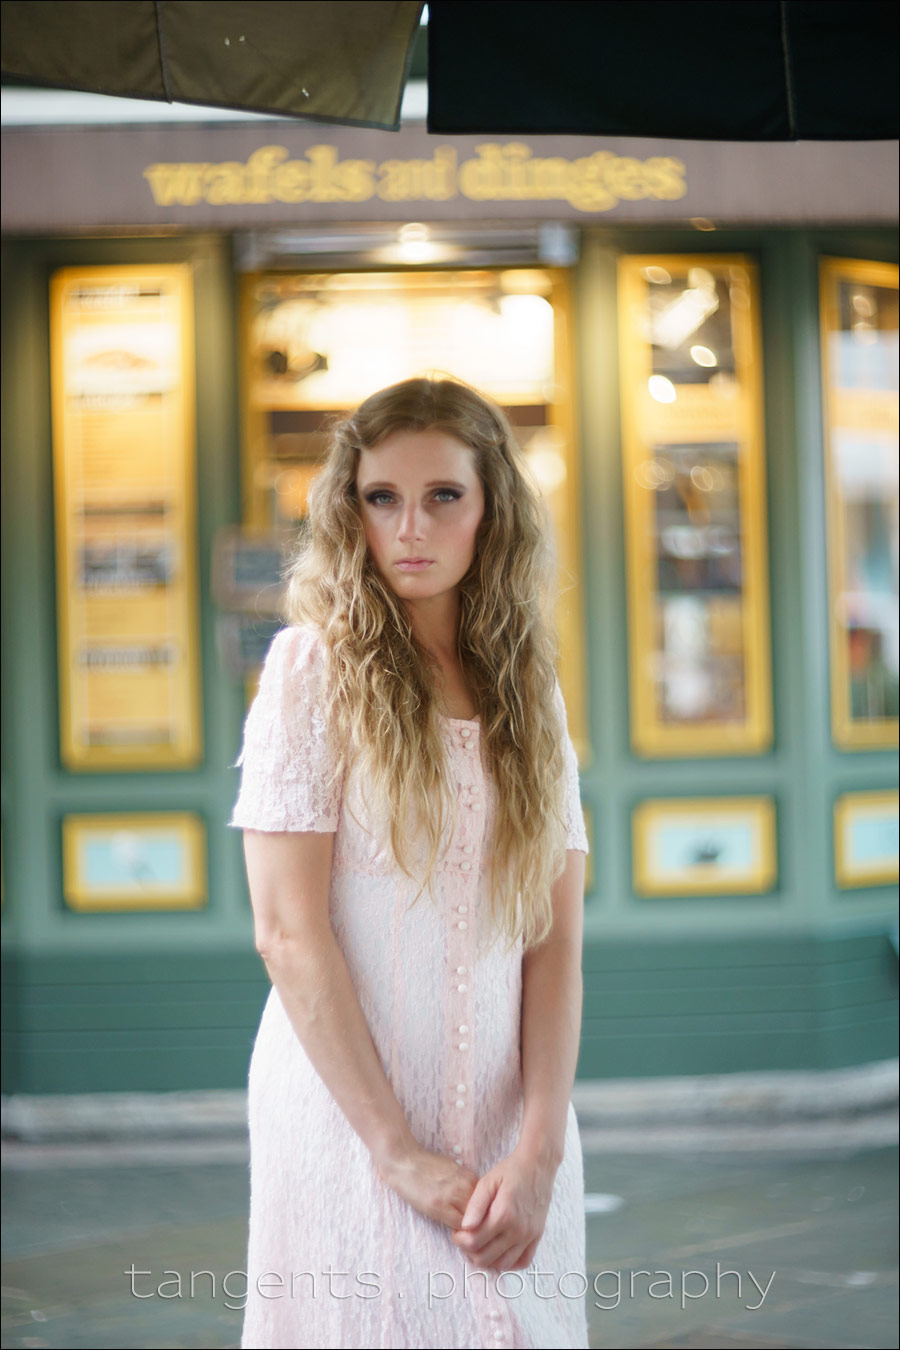
With this next sequence of photos, including the one shown at the very top of this article, we were working somewhat under the edge of one building, but with enough of the 42nd Street scene behind Nicole to give a beautiful background – defocused, but interestingly busy.
Here again is the pull-back shot from my iPhone to show where we were.
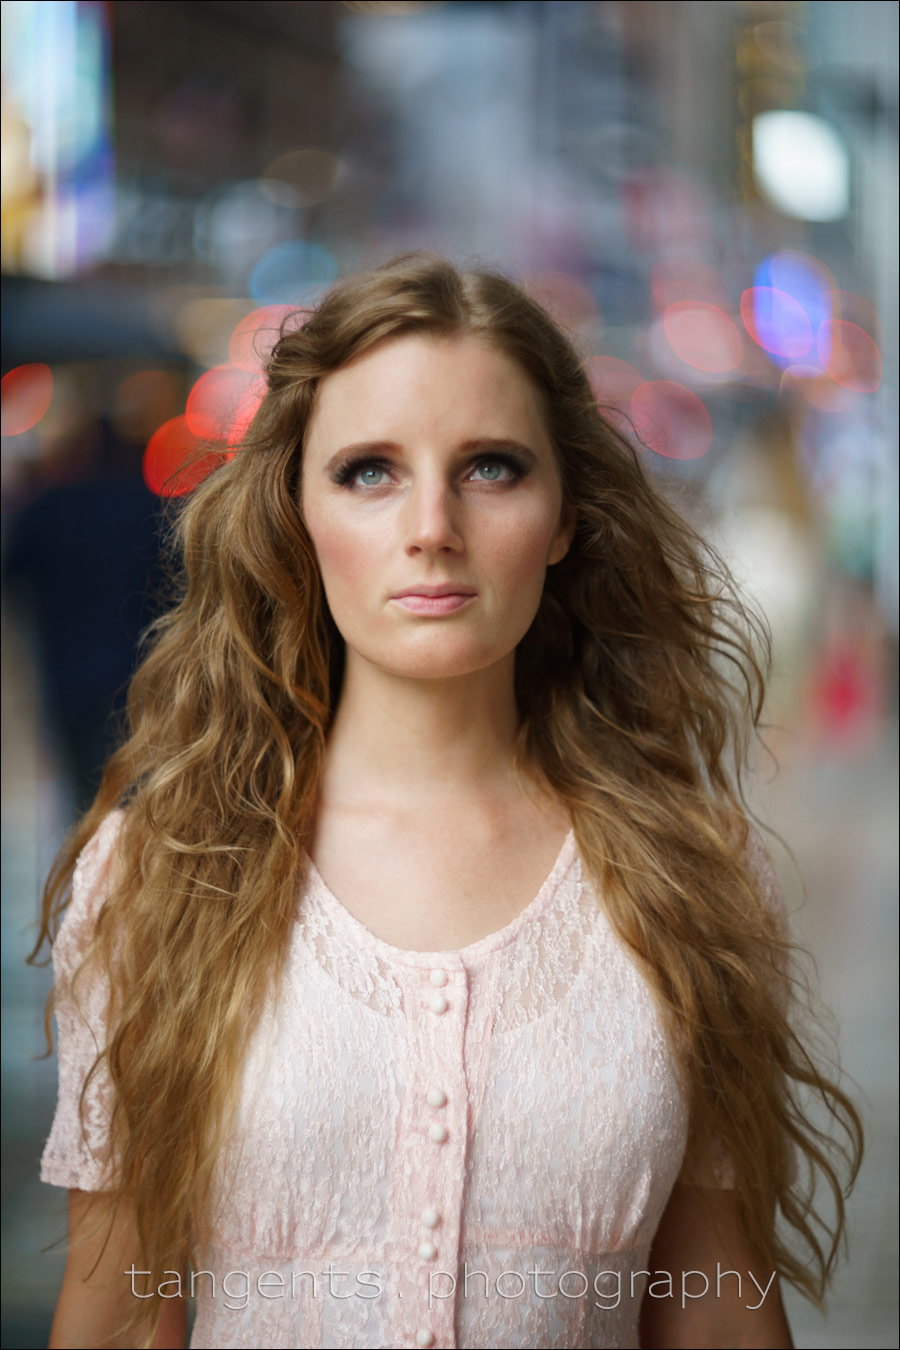
Working with the building close to us, and the wide open street scene on the one side, we had this beautiful modeling of light on Nicole’s face, with that gentle gradient to the shadow side.
The lighting here really has to do with where Nicole was positioned. While it might seem a random point on the sidewalk, the light here was just perfect for what we wanted.
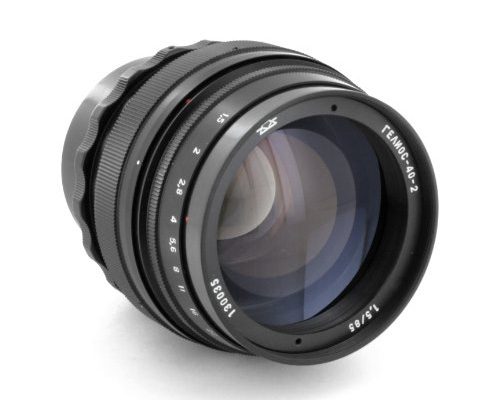
About the lens used during this photo shoot
Helios 85mm f/1.5 – for Canon (B&H)
Helios 85mm f/1.5 – for Nikon (B&H)
For a review of the lens: Helios 40-2 85mm f/1.5 lens
Related articles
- Review: Helios 40-2 85mm f/1.5 lens
- Portraits with vintage lenses
- More articles on using vintage lenses / classic lenses
- More articles on Bokeh
- Available light portrait photography (model: Anastasiya)
- Using interesting available light & White Balance options (model: Olena)
- Available light portraits – Composition, light and style (model: Christy)
- Observing and using the available light (model: Anelisa)
Beautiful images as always Neil. Hard to always position your subject with a dark background using only available light. Placing someone a yard or two inside covered shade (e.g. just inside the front door) helps me to get the soft available light come more from the ‘front’ than from above to create more of a studio lighting effect
Great article! It seems to be more effectly to work in a cloudy or raining day for that consistency. In a sunny day it’s more difficult to control. Do you usually work in that situations on direct sun light?
Sergio, where I can, I try to avoid hard direct sunlight. so working in the shade or under an awning is my preference.
Other than that, there are ways to work in bright direct sunlight.
Amazing what you can do even in the rain!
Beautiful images Neil and interesting lens choice! I remembered you had posting on this lens back in 2017, so went back for a refresher. Thanks.