Creative portrait photography – Allowing opportunities to happen
There was an interesting challenge for me during a recent individual photography workshop in NYC – Don (who arranged the workshop), already knew the essentials of lighting techniques, and said what he really wanted was insight into the way that I see a photo before I take it. How do I know something will work or not. Don was particularly impressed with the series of photos of Anelisa that I shot for the review of the Profoto B2 Flash. The shallow depth-of-field images was a particular draw-card.
Serendipity – I love that word. A bit of chance favoring you. When a tiny bit of serendipity comes your way during a photo shoot, you have to be open enough to see it and then run with the idea. In effect, you have to be open to opportunity and allow it to happen to you.
There are a number of examples on the Tangents blog where I stumbled on interesting found light, and used it for effect:
- Random sunlight reflecting off glass buildings (model: Anelisa)
- Sunlight reflecting off a traffic sign (model: Olena)
These are the kind of opportunities that you need to allow to happen, and not get fixated on the ideas you had in mind. Grab what is happening and work with it. Here is one example from the workshop in NYC:
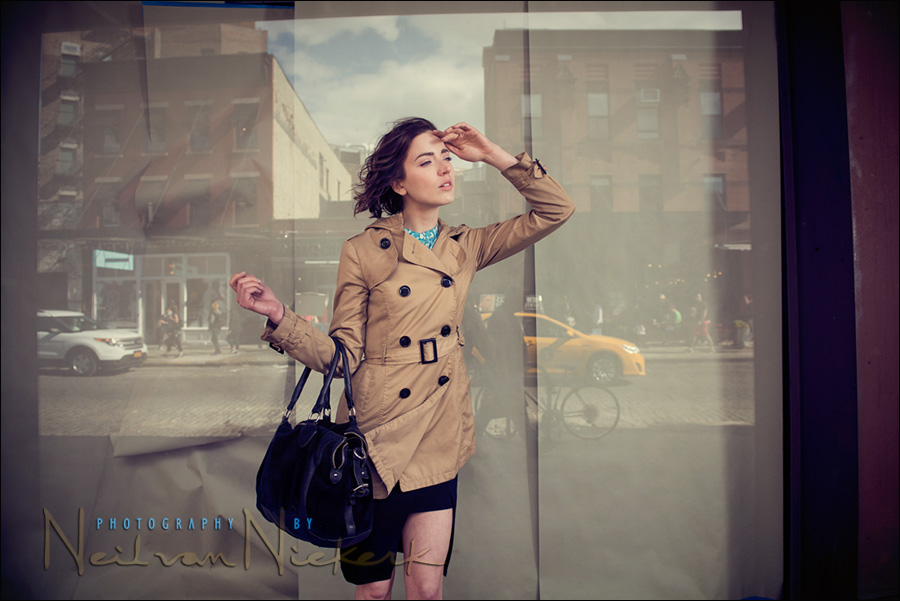
We were photographing Anelisa against some of the colorful doorways in this area. As we walked past this shopfront that was being renovated, I noticed that with the brown paper covering the inside of the windows, the street scene was now reflected with muted but warm tones. This might just be ideal for a retro look! It also helped that some of the paper was crumpled to give a slightly surreal effect on first glance. I liked this!
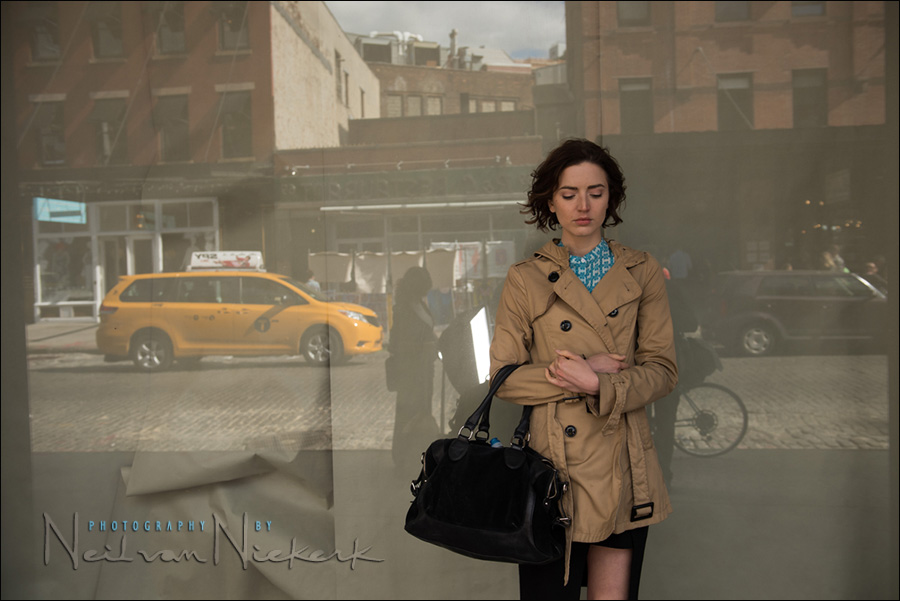
This is the test shot to get to my basic exposure, based on the background – the reflected scene. Then the next step was to add flash to bring the exposure up, but mostly to control the light – something dramatic and flattering. This helped etch Anelisa against the muted background.
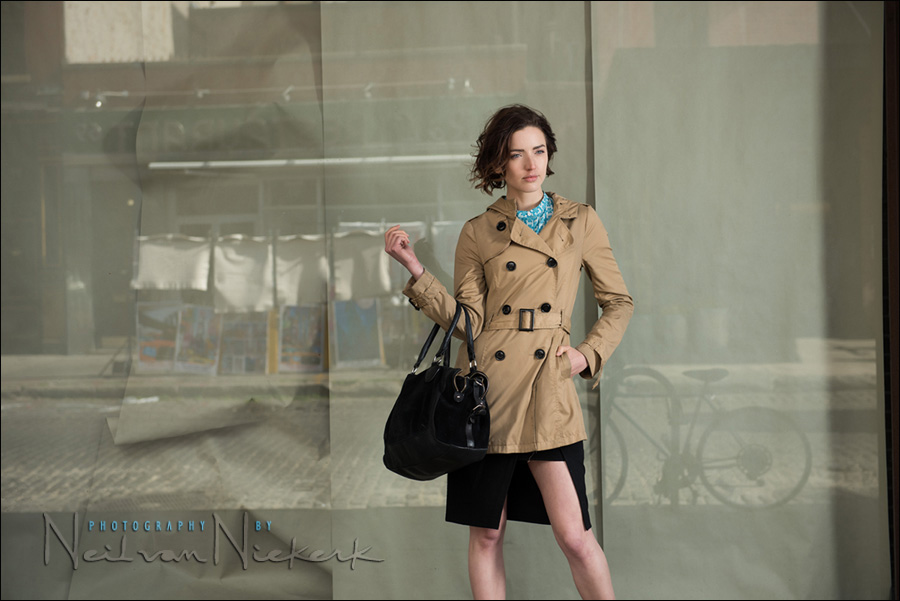
Trading the simplicity of the color backgrounds of the doorways for this more complex background. This works because the background is out of focus, and the lighting helps pull attention to Anelisa. It was pure coincidence that her coat matched the background colors.
Then finally the image (at the top) which I liked the most, to which I added some post-processing flavor to enhance the retro look.
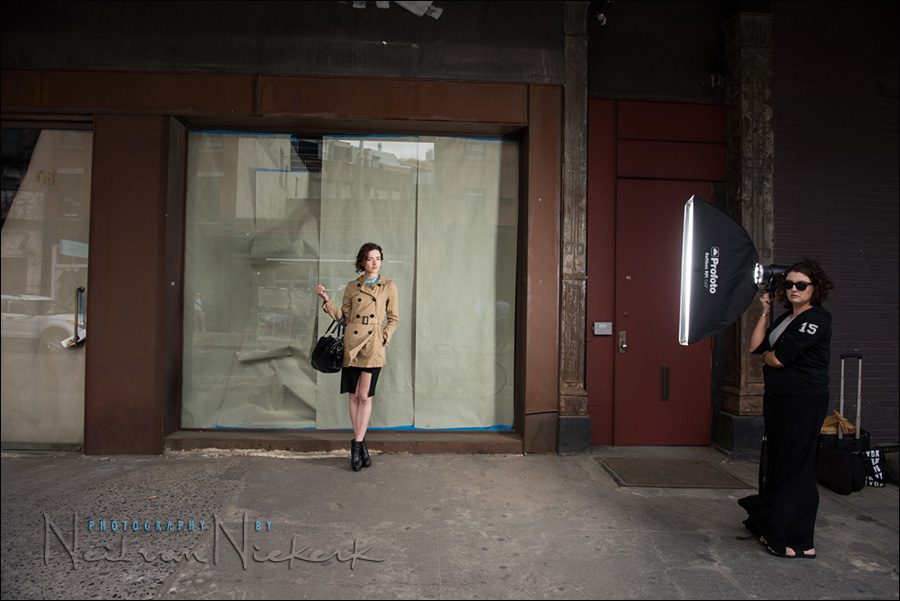
Camera settings & photo gear (or equivalents) used during these photos
- 1/250 @ f/4 @ 200 ISO
- Nikon D810
- Nikon 24-70mm f2.8G AF-S / Canon 24-70mm f/2.8L II
- Profoto B1 battery powered flash
- Profoto RFi 1’×3’ softbox
- 75″ tall Gitzo monopod

Summary
Even with the Profoto B2 review photo shoot, I had a tentative route planned for the day, but in the end we didn’t go to any of the places I originally had in mind. As I mentioned in the comments section of the video clip of the Profoto B2 review photo shoot, the plans for the day were somewhat different – I had this idea that we could walk down the 5th Ave area, and use f/1.4 and HSS flash with the Profoto b2, to throw everyone else out of focus (and under-expose them), and thereby making Anelisa the high-lighted subject in the frame. On our way to pick Anelisa up, we drove past Columbus Circle, and I immediately said that this would be where we should start. From there we adapted and changed the plans for the day … doing nothing we had originally thought we had roughly planned.
By being flexible, I allow the unexpected to happen. Perhaps this is just a luxury I have when shooting for myself, and not to a client’s brief. Still, I do believe this is a big part of creativity –
The good thing is that it isn’t all that esoteric. There is a loose pattern or formula to this. As mentioned in the related post: candid portraits on the street – applying what you know, I immediately look for certain things, whether a candid portrait on the street, or posing a model during a photo shoot.
- 1. Complementary or uncluttered background – look for lines and patterns. Or just a neutral background. Or throw it out of focus. Whatever you do, be specific about how you use the background.
- 2. Framing / Composition – check what you include, and what you exclude in the frame. Change between horizontal and vertical. Shoot wide & tight. Crouch. Do off-center compositions for negative space.
- 3. Flattering or interesting light – control the light, and how you position your subject.
- 4. Posing – how you pose your subject, and the direction of the light, are inter-linked considerations.
Doing so creates a certain structure to any photo session. There has to be a baseline. There has to be at least the intention to create solid work. I like that word too – solid.
We have to know our photography technique, and then not stress about camera settings and such. Then the creativity can “ride on top of” that understanding of our technique and our gear, without us having to get too caught up in technique and gear. That’s where we can spontaneously respond to what we are seeing, and to our environment and our subject.
Keeping to that loose formula allows you to get photos that are solid, while also freeing you up to embrace those moments when things fall together in unexpected ways. Then change one thing up, or two things … or three. Surprise yourself.
Related articles
- Using interesting available light & white balance options (model: Olena)
- Off-camera flash for that extra bit of drama (model: Olena)
- Informal / candid portraits on the street – applying what you know
- Progression of an idea in a photo session – (cosplayer, Ger Tysk)
- Available light portraits – composition, light and style (model: Christy)
- Effective on-location portraits (model: Anelisa)
There are so many opportunities around us. Even without the Profoto big flash, I bet something cool could have come out of the environment with bounced flash. We just have to see the bigger picture and not the often immediate negative “Oh, that won’t work.”
True – this photograph didn’t need the power of what the Profoto B1 provides – it was just that this is what we had on hand. At these camera settings this could as easily have been accomplished with an off-camera speedlight in a softbox. But not bounce flash.
Neil, I’d like to thank you all the articles, case studies you pour onto us! Your tutorials like this made me a fan of flash, and my photography evolved since then.
Neil, just curious… in these photos, with the muted background, would you use center weighted metering or spot metering as opposed to matrix metering? Do you normally stick to a specific metering method and adjust it as necessary?
It seems to me, when photographing a specific subject, which doesn’t occupy the whole frame, a center weighted metering might yield more accurate results.
Franco … I am rarely away from Matrix / Evaluative metering.
Much more important than the metering pattern, is the thought-process that goes into metering.
Keep in mind that the camera settings I chose in the end, are independent of the metering pattern.
Check this article for a more thorough explanation: which exposure metering mode for outdoor photos?
Excellent, thank you!
Nice to see the though process and the image coming together to the final process.