Bounce flash vs. Available light vs. Using the videographer’s light
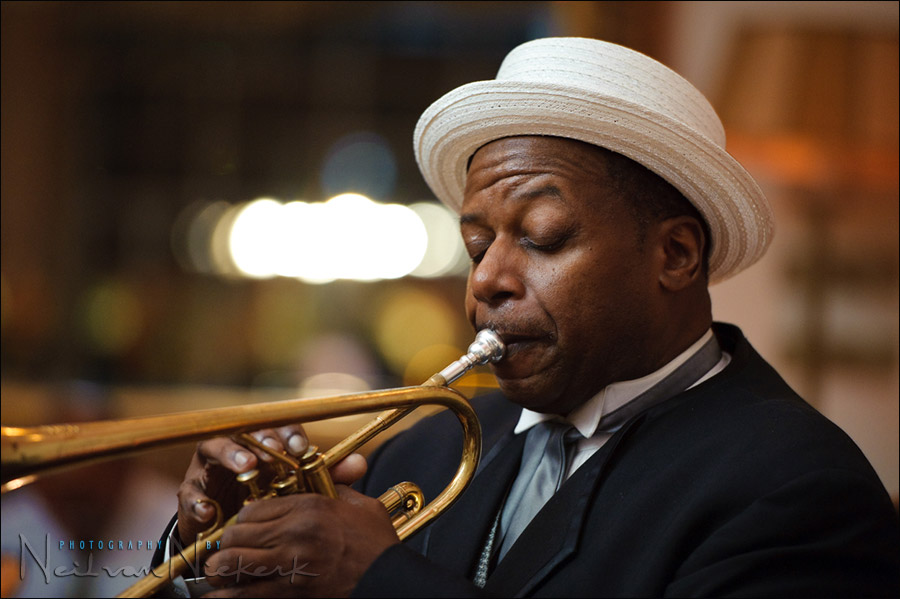
The expressive trumpet player in the band at a wedding – a simple portrait of this musician, sweetened with some bounce flash. The light on his face, is by now perhaps predictably, on-camera bounce flash with the black foamie thing. Looking at the light pattern on his face, you’ll see there was no direct flash of any kind.
- camera settings: 1/60 @ f2.8 @ 2000 ISO // TTL flash
- Nikon D3; Nikon 70-200mm f2.8 AF-S VR II; Nikon SB-910 Speedlight
In comparison, here are a few other images. One with no flash, so we can see the effect of the bounce flash. Another image with just available light; and another image where I was able to use the light from the videographer’s camera.
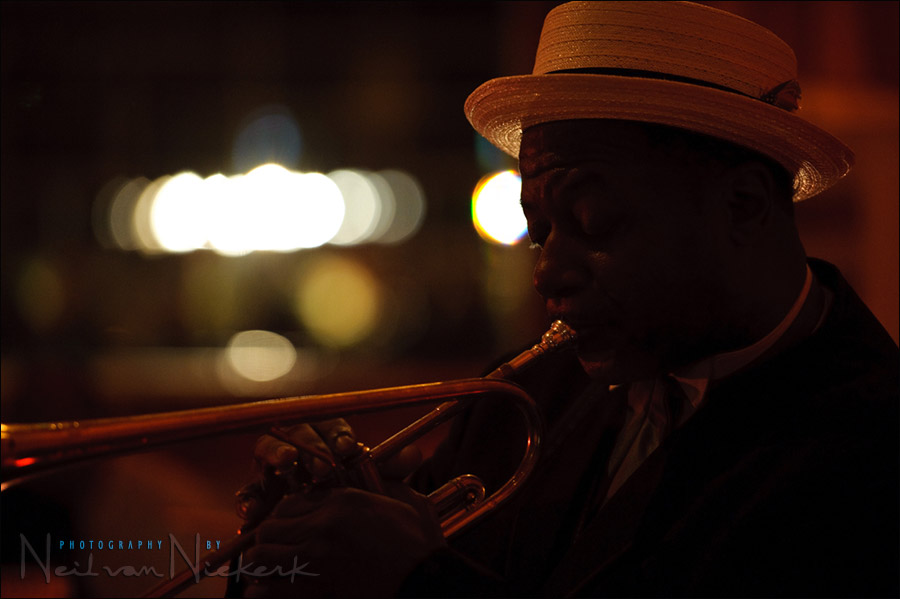
The same shot as at the top, but with the flash disabled. This is the available light as it appeared with the camera settings where I had used bounce flash – for comparison so you can see the effect the on-camera bounce flash had.
1/60 @ f2.8 @ 2000 ISO
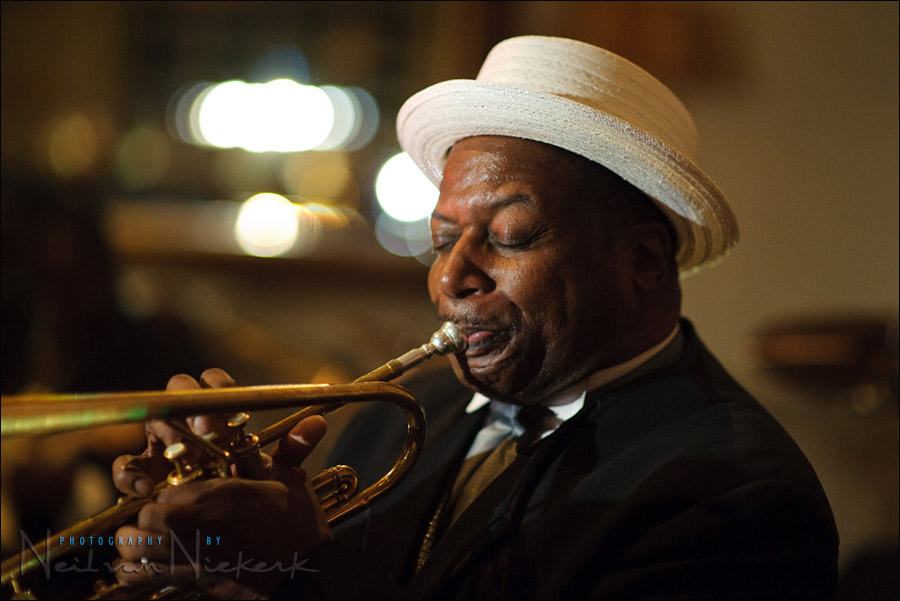
Here is the same image, but with available light only, using the existing light in the room. Now we’re really pushing the limits, and a wide aperture on the 85mm lens, and the highest ISO on the camera (Nikon D3) that I’m still comfortable using. The shutter speed is also fairly slow, and I had to take a series of images to get a few that are sharp enough. Despite the popular belief, 1/60th just isn’t fast enough to hand-hold, and isn’t fast enough either when your subject is moving. And no, a third stop jump to 1/80th wouldn’t have magically solved that problem either, for those who are thinking of a shutter speed in relation to the focal length.
- 1/60 @ f1.4 @ 3200 ISO
- Nikon D3; Nikon AF-S Nikon 85mm f/1.4G
I changed the WB in raw post-processing to give me the most pleasant tones.
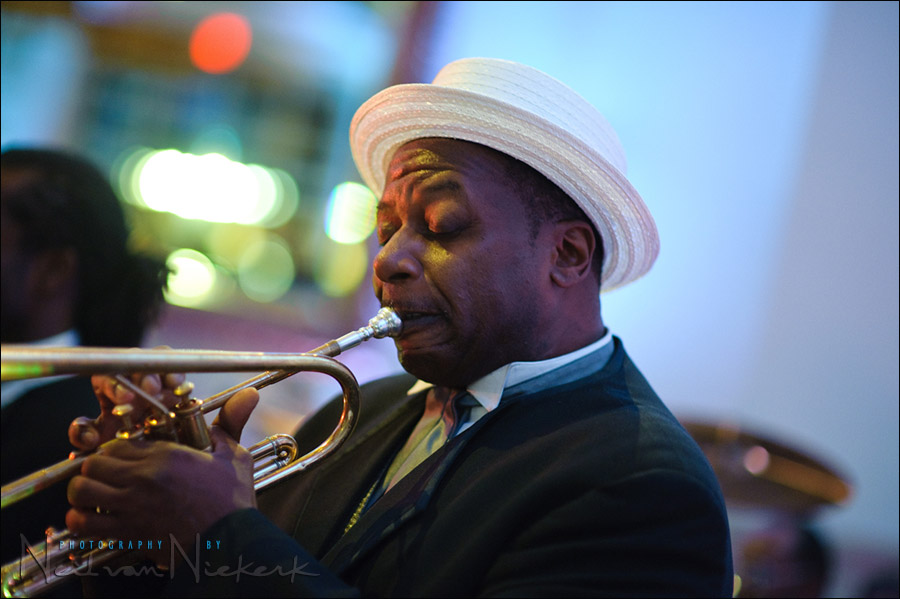
When the videographer’s light came into play, I changed my settings again:
1/100 @ f1.4 @ 3200 ISO // no flash
I had to pull down the exposure by 0.6 stops in raw post-production.
Direction & Quality of Light
I wanted to distill the essence of what we, as photographers, work with – light! Before we can truly grasp on-camera flash and off-camera flash, and really, any kind of photography, we have to be aware of the direction and quality of light. We need to observe the light that we have, and then decide how best to use it, or enhance it.
With this book, I try my best to share those “aha!” moments with you, and I do believe this book can make a difference to your photography.
The book is available on Amazon USA and Amazon UK, or can be ordered through Barnes & Nobles and other bookstores. The book is also available on the Apple iBook Store, as well as Amazon Kindle.
Summary
So here are three different ways to use light to photograph an impromptu portrait – in this case, of a portrait of a band member playing at a wedding.
Personally, I like on-camera bounce flash here for allowing me control over my camera settings – i.e., less risk of camera shake, and I have more say in what the aperture and ISO should be. And the image looks quite natural – there’s no indication that on-camera flash was used. But in a way, there’s no wrong or right – as long as it looks good. And as long as you are able to consistently deliver the goods. Make it work!
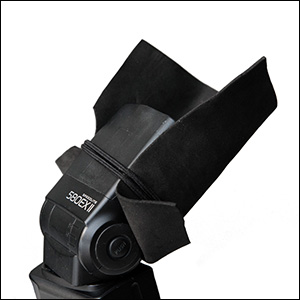
On-camera flash modifier – the black foamie thing
The BFT is held in position by two hair bands (Amazon), and the BFT is usually placed on the under-side of the flash-head.
The linked articles will give clearer instruction, especially the video clip on using the black foamie thing.
Related articles on bounce flash photography
- Video clip: Using the black foamie thing
- Directional bounce flash
- The black foamie thing
- Throw away the plastic diffuser cup on your flash
- How to get ‘short lighting’ with bounce flash
- Wedding photography – Dealing with the videographer’s light
I’d have to say if I was in the same situation I would need to use flash. My camera is horribly noisy at 3200 ISO. I think most people don’t have camera’s that produce clean images at such high ISO’s so knowing how to use flash is essential. I used to be afraid of flash, but thanks to this blog I don’t hesitate anymore :-) Thanks to you, Neil!
Hello Neil. I noticed you are using the new 70-200 vr2 lens. I am about to push the button to buy this lens. Can you tell me if the new version worth the upgrade from the old one. I know there is some breathing with the vr2 which gives you a shorter zoom range at a given distance. Have you had any issues with that?
Thanks,
Arnold
Arnold, I do notice the ‘breathing’ in focal length change when I zoom towards 200mm at close focusing distance … but only when I compare it to another lens. But it isn’t a big deal for me.
Here is my initial response to the new Nikon 70-200mm f2.8 AF-S VR II … and I am even more impressed now.
Neil, how high ISO are you comfortable in using usually? Actually the reason I ask is I wonder how much difference there is between DX and FX sensors. Since I find ISO1600 ‘usable’ on a D90, I would expect that on FX you could get the same level of noise somewhere ISO3200-6400? But I’ve never seen 100% sized pics from an FX.
When photographing indoors,
– and needing to get some available light to register, or
– relying on only on-camera bounce flash in a large room,
then I start at 1600 ISO as my default low-light ISO.
But this is with the Nikon D3 which excels at this.
As to how the noise looks at such a high ISO, have a look at this entry on the Nikon D700. Click on the image, to see a 100% crop of the 3200 ISO image.
Thanks Neil.
Cool trumpet!
I love the way the flash cleans up and polishes the image while still retaining the mood of the scene. btw, I assume you were carrying 2 cameras at the time which allowed a quick change to the 85mm f1.4? I forgot to ask you at the flash workshop if you have any tips on carrying two cameras at once. I always feel like a ‘bull in a china shop’, fearing that I’ll spin around and knock a guest’s drink out of their hand with a stray lens…
Yup, two cameras. I have muscles!
The way to keep the camera from knocking things over when you walk, is to turn the camera around on your shoulder. Have the back face to the front of you … then the lens tucks away around your hip, pointing backwards.
Hi Neil,
Love the shot!
Surely with the new processing engine of Adobe camera RAW 5.7 (plus 6) or even Lightroom 3 you should quite comfortably able to use ISO-6400 on your D3, for a large print and possibly even ISO-12800 for a medium size print without even being concerned. Have you had chance to try the updates?
David
David .. I didn’t do a comparison, but the updated ACR does seem noticeably better with high-ISO noise (like you had mentioned in the email).
All the more reason to keep RAW files forever, so that you can go back and re-edit key images if you ever need to.
Neil, I fully agree about keeping RAW files, a few years ago I didn’t know different and deleted all my RAW’s after developing them, :-( oh dear! :-D
Below is one post I would like to see revisited, if you would like to try a new processing engine noise reduction comparison.
dealing with high-ISO noise
Maybe (for that first shot) with the Luminance noise reduction set on 20 or 30 and the Color noise reduction left on the default setting.
I think you will be very pleasantly surprised! :-)
Hope you’re having a great weekend.
David
Actually as an update to my post yesterday!
Would I be correct in guessing “The importance of permanently archiving your RAW files” will be a future blog entry? :-)
David
That RAW file is so deep in the archives it would take too much time to delve it up.
Hi Neil,
I noticed you use a high ISO allot, I have a Canon 50d and I hate going past 1600 even at that I see the horrible grain effect. Any tips? I know using a flash, but if I wanted to keep the natural ambient light and use flash as fill, and my camera settings are ISO 2000 or more?
Thanks
Paula .. the good news then is you’re going shopping!
If you don’t want to go past 1600 ISO, then you will have to affect your aperture, or use a larger flashgun for more power.
The obvious thing to do then is use a lens with a wider aperture, like a 50mm f1.4 or an 85mm f1.8 (or wider). With these lenses, you’d be able to keep your ISO lower and still get proper exposure.
The first one is definitely the best! One question though.. if the trumpet player is facing the crowd (which I presume he’s doing), then how can you bounce off a side-wall with your on-camera flash (to lighten up his face)? The flash would point to the crowd, not to a wall..?
the black foamie thing … catch up. : )
btw, the closest wall was to my right. So I didn’t bounce off a wall.
Ah ok, you bounced off the ceiling?
Kris .. I am hesitant to say it like that .. that I bounced my flash off the ceiling, because then the assumption made by 90% of photographers who read it, will be that I bounced my flash directly above me into the ceiling. The usual way for most photographers who bounce flash.
I bounced my flash into the direction that I wanted my light to come from.
So a little bit behind you and a bit to the left (and with your foamie thing) ?
Neil,
Do you use Auto-ISO for these flash shots? Or did you manually set to ISO 2000?
Thanks
I don’t use auto-ISO. I usually prefer everything Manual on my camera. (Flash can be either TTL or manual, depending on the situation.) Therefore, the 2000 ISO setting is deliberate.
Amazing light – well done!