
Checklist for portrait photography on location
There’s that algorithm that I most often use when shooting on-location portraits – find an interesting or complementary background, that also has good light on my subject. If there isn’t good ambient light, then I add light. Then, my subject’s positioning and pose is adjusted so that the photograph comes together.
- Find an interesting or complementary background, that also has good light on my subject.
- If there isn’t good ambient light, then I add light.
- Then, my subject’s positioning and pose is adjusted so that the photograph comes together.
This straight-forward algorithm, step-by-step keeps me on track when things get frantic, or I need inspiration. It’s a consistent topic here – effective on-location portraits – because I often see photographers who attend a workshop or a photo shoot-out, feel overwhelmed. They don’t quite know where to start. There’s New York that is bustling. There might be a model …. and now what? This algorithm helps kick things into gear from the start.
With wedding portraits for example, where time is limited and the pressure is on – this is what I rely on: a known method that gets me results. And from there on, I can improvise and use anything interesting that comes up in terms of the light or location.
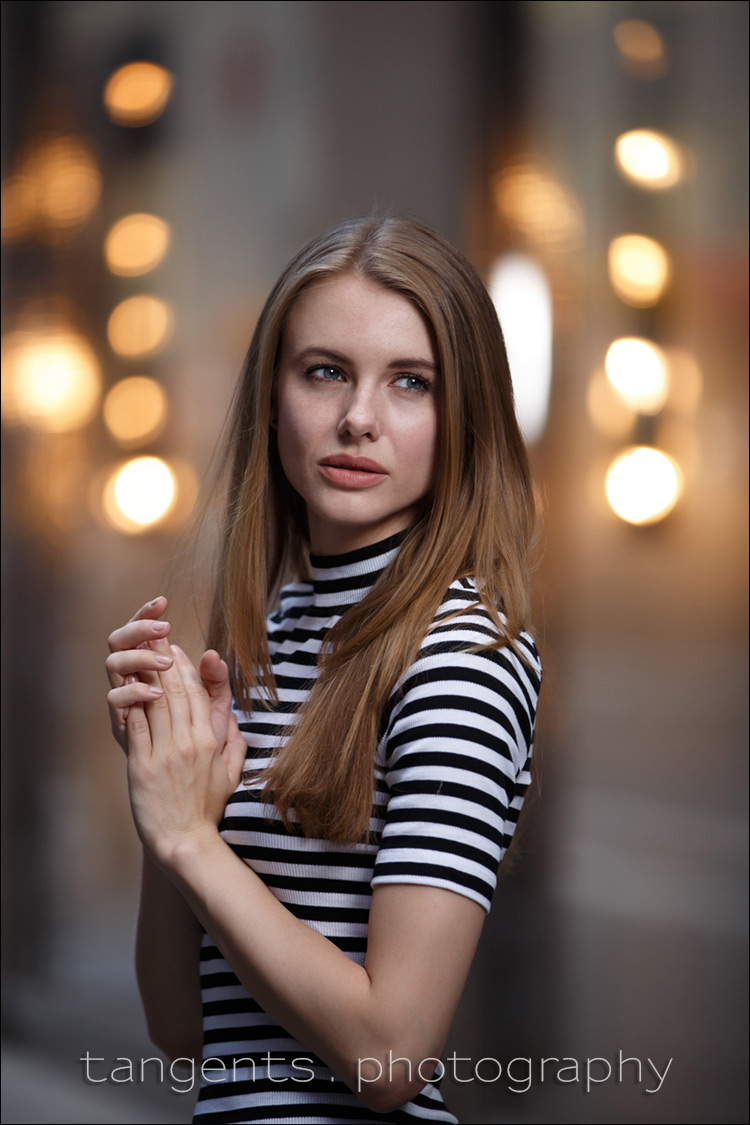
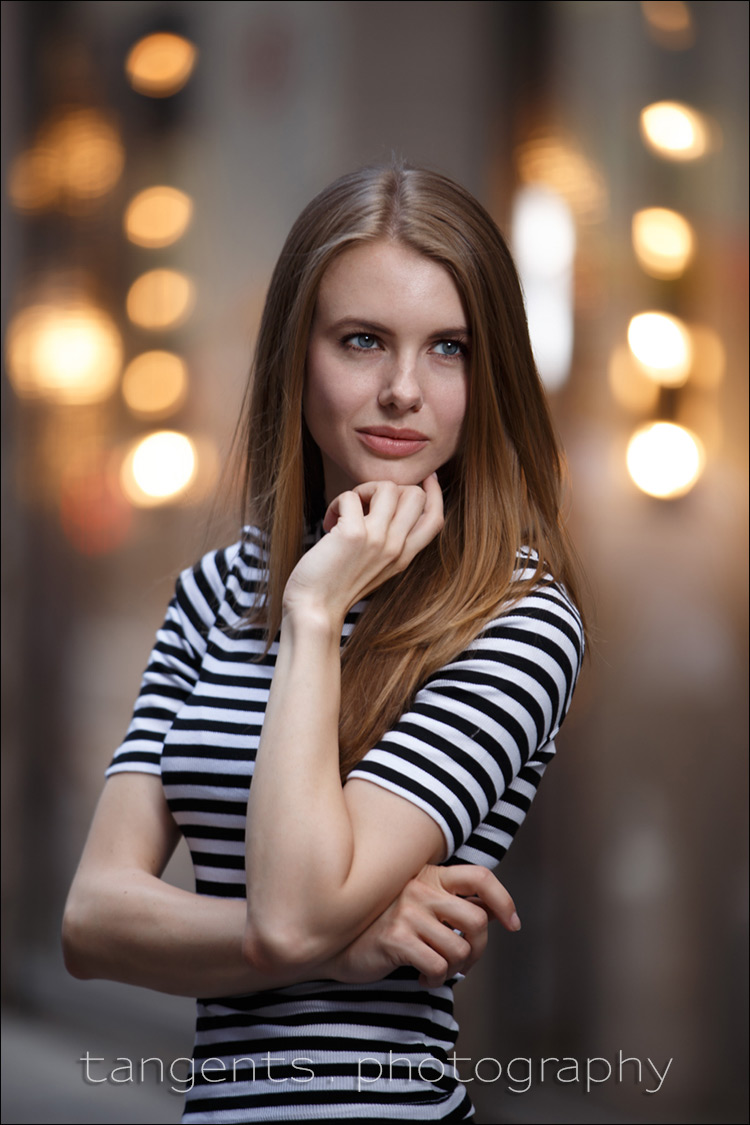
With the examples here of our model, Anastasiya, the pull-back shot will show where we were shooting. The location looked more unassuming than the results.
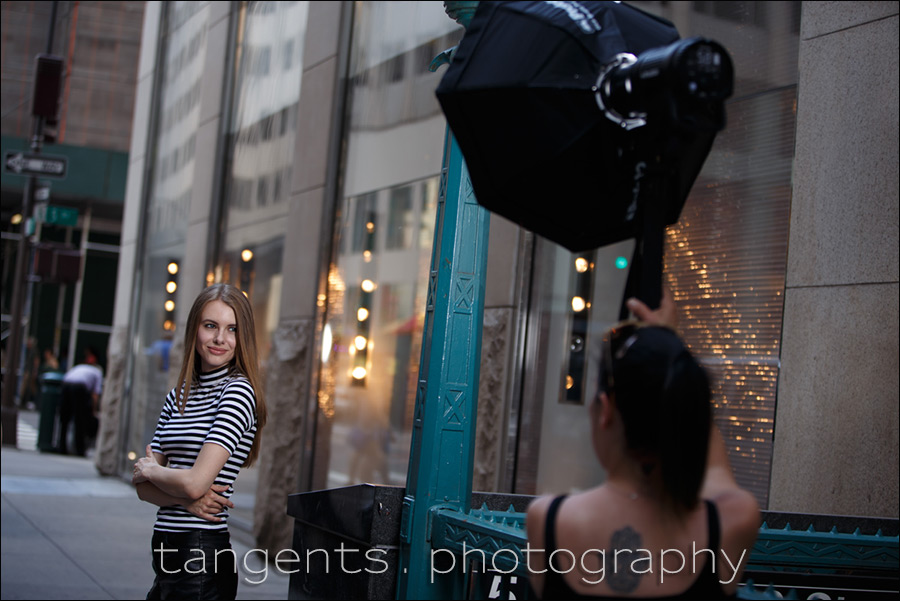
Camera settings, and photo gear used in this setup
- 1/160 @ f/2.8 @ 100 ISO
- Canon 6D
- Canon 70-200mm f2.8L IS II (B&H / Amazon)
- Profoto B1 battery powered flash
- Westcott Rapid Box 36″ Octabox (B&H / Amazon)
- 75″ tall Gitzo monopod to hold up the light
That’s the background! Just a few out of focus lights in window displays. Other than that, the surroundings were fairly drab in the late afternoon on a cloudy day. Of course, using off-camera flash really gave the photographs that extra pop.
If you came to this article looking for an equipment checklist, well, you have options in terms of which lenses you can use. My default though is the versatile 70-200mm f/2.8 zooms. I would put that at the top of my checklist for photo gear for portrait photography. With that lens I can shoot towards the longer focal lengths, and use the lens (nearly) wide open, and with that isolate my subject. It’s an easy way to really accentuate your subject in whatever surroundings you have. Here is more on that topic: Making your images pop through lens choice – Compressed perspective.
Summary
Working with a consistent method like this at the start of a shoot, helps me keep the momentum of the photo session going, while still allowing enough variety in the images.
Related articles
- Review: Canon 135mm f/2L vs. Canon 70-200mm f/2.8L IS II
- Posing technique – Adjusting a pose with incremental changes (model: Irene B.)
- One thing you can do to improve your portrait photography
- Wedding photography: posing and lighting – a consistent style
- Posing people: Tips for improving your portrait photos (model: Adrienne)
- Becoming more confident in posing people
- Effective on-location portraits (model: Anelisa)
Thank you for another great article. Lately I watched another photographer’s opinion about using focal lengths for portraits and the effect you want to create with it. Concerning the telephoto lenses he said that if you have a distance of more than 13 feet between model and photographer it would be weird to have the model look at the camera (seem aware of the camera). The model should then look somewhere out of the frame (seem unaware of the camera). Because the photographer is far away the model should seem unaware (spyed at).
I instantly thought of you and that you are using the 70-200 quite often for portraits. I realized just yesterday that i.e. the brides and grooms you picture hardly look at the camera. Instead they look at themselves as you try to picture the feelings between them. And now I am looking at the pictures of Anastasiya above and she is also not looking at the camera.
Do you think the same way?
You know, I have never heard of it formalized like that, but it kind of makes sense. But then, I wouldn’t use it as a strict rule.
Here I had Anastasiya look at the camera, and also look away. A mix. Then it is easier to pick favorite images afterwards if there is an assortment.
Hi Neil…I noticed you used the Canon 6D for this shoot versus the Nikon gear you normally use. Any particular thoughts on how it performed for this sort of portrait shoot? I ask because I’m considering the 6D in lieu of the new 5D Mk IV.
I was shooting for new content for the Tangents blog – specifically the comparison between the Canon 135mm f/2 and the Canon 70-200mm f/2.8 IS II. And that is why I happened to be shooting with my Canon 6D on the day.
The 6D has a sweet sensor, but the AF is hampered compared to the 5D mk3 and mk4.
Specifically looking just at how the high-ISO noise compares, the Canon 6D isn’t far behind the much newer Canon 5D mk IV, in my opinion. But download some of the RAW files from that link, and have a look for yourself.
Hi Neil, what power level was your flash set at and how did you decide on that? Were you on manual flash or TTL? Thanks.
Jennifer, the beauty of the Profoto B1, is that you can establish correct (or close to correct) flash exposure via TTL mode. Then, if it looks good, (or after you’ve jiggled the FEC up or down a bit), you can lock the exposure by hitting “Manual” on the remote control.
This way I am not usually aware of the specific power settings on my Profoto B1.
Hi Neil,
I noticed you use a monopod to hold up the lights. Do you always have an assistant? What do you use to hold the lights when you don’t have an assistant? I am trying to work out my lighting kit requirements for early in the new year.
Asha … in New York specifically, I have someone holding a monopod. Then we’re less likely to be an obstruction for pedestrians, and then less likely to get busted by the cops to move on.
On my own, I use one of the tall Manfrotto 1004BAC lightstands.
Once again your article was very thorough and thought-provoking. I can’t thank you enough for your website. You have taught me to shoot in manual and over the last 4 years I have become confident when I shoot. I have learned so much from your articles. I feel like I owe you cash for your time. I have two of your early books, so I guess I have contributed to you in a small way anyway.
I have just ordered a 50 mm f 1.8 d lens for my Nikon d7000. I had intended to use it for portraits on my crop sensor body. I notice that you use the 70-200 quite a lot of the time…have I wasted my $100 on this lens, or will I be able to use it for portraits that I take. I can not afford the 70-200 lens, but I have always improvised with the lenses that I have. I am not a professional, but I have a passion for photography and enjoy every day that I am shooting! Thanks for the website and, most of all, for the teacher that you are. My favorite video of yours is a B&h SEMINAR that I have watched front to back about 9 times. Thanks Neil
Hi there Kevin … thank you for the kind comments! Regarding your 50mm lens – it is so compact (and inexpensive) that I think it needs a place in your camera bag. On the crop-sensor camera, it effectively acts like a tighter portrait lens … and you still have that shallow DoF.