Flash Photography Techniques
Flash photography basics ~ Video lights for photography ~ Flash photography tips
![]()
Using video lights for photography
In addition to using various speedlights and flashguns, I also use video lights as additional lighting with stills photography. Using an incandescent video light in a scenario where tungsten light is the dominant source of light, helps in achieving a more natural look. Video light is also a continuous light source, making immediate changes to the lighting intuitive – what you see is how it will appear. A video light is an interesting and exciting lighting tool to use. Most video lights are compact enough to easily find a place in your camera bag.
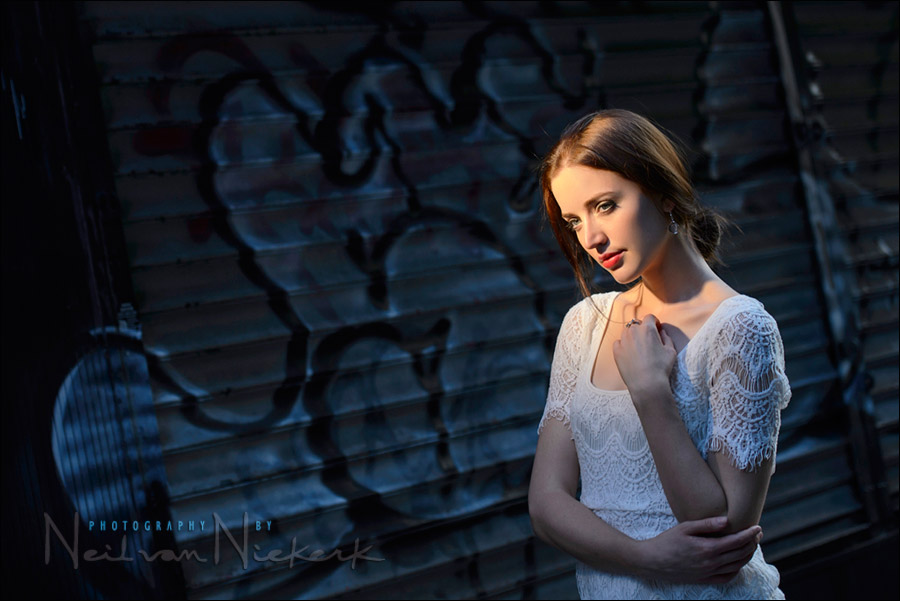
Since a video light is a small light source (compared to a flash with a softbox or umbrella), it will lend a more dramatic look to portraits. It has a specific aesthetic, and coupled with the direct intuitive way the light can be used, a video light can add more variety to your portraits.
The counter-point to this is, that since the video light is usually a small light source, you have to be very specific about the position of the light in relation to your subject, and your subject’s pose. Generally, we want to make sure our subject’s eyes aren’t shrouded, or unflattering and harsh shadows across their face.
Below this tutorial on how to use video light, you will see a few links to other articles on how to use video light for photography.
Articles on the use of video light in photography
- Bounce flash vs video light (model: Shawna)
- Video light vs bounce flash (model: Crystal)
- Video tutorial on using an LED video light
- Buying a video light for Photography & Video
- Positioning the hand-held video light (model: Anelisa)
- Lighting ideas for the romantic wedding portraits
- Bride & groom portraits with video light (Allison & Scott)
- Exposure metering when using video light (Amy & Clark)
- Use light & lighting to add impact to your photos (Grace & Joseph)
- Using video light for dramatic portraits (model: Sasha)
- Posing and lighting – aiming for a consistent style (Nicole & Brad)
- Using video light for macro detail photos at weddings
- Video light for the romantic portraits of the bride and groom (Julia & Louis)
- Romantic wedding portraits with video light (Tatiana & Brandon)
- Photography with video light and daylight (model: Anelisa)
Check out the blog category for video lighting for stills photography for other related articles.
A variety of video lights
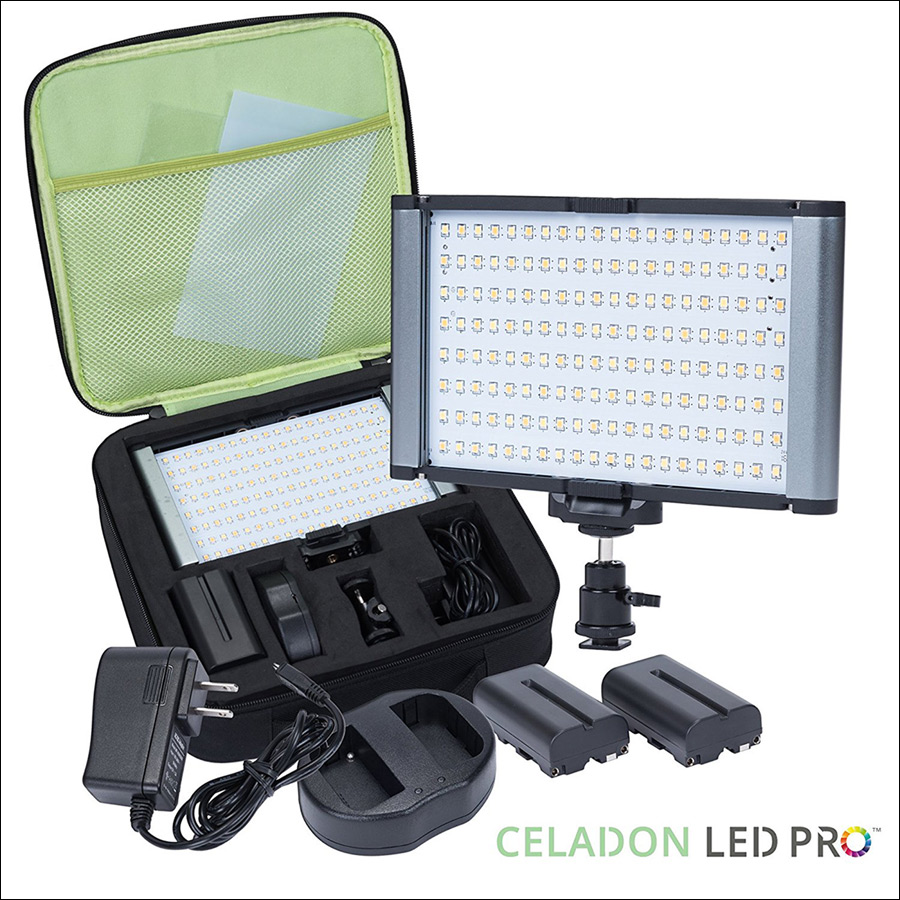
There’s a variety of video lights available on the market. The two that I currently use are:
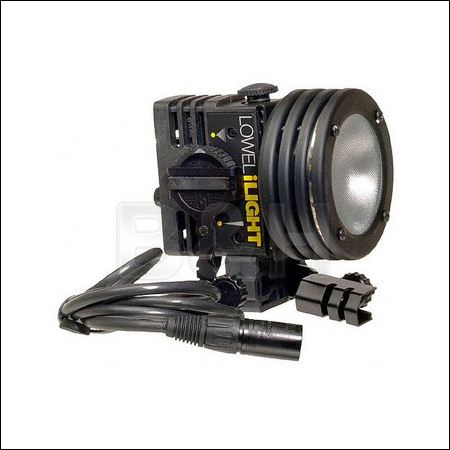
The other video light I use is a system based around the Lowel ID-Light (B&H / Amazon). I use the Lowel ID-light with the XLR power connector. Other options are available. The Lowel ID-light is fairly powerful as these lights tend to go. The system includes barndoors and diffusers to manipulate the light.
- Lowel ID-Light 100 Watt Focus Flood
- Bescor MM-9 XLRNC battery – of course you would need a battery to power the light.
- Lowel Handle and Stud-Link – a more comfortable way to hold the hot video light..
- Lowel Complete Four-Leaf Barndoor Set – to flag the video light – ie, control the way the video light spills.
- spare 100W bulbs – just in case!
 next section: Flash photography tips
Help support this website
If you find these articles of value, please support this website by using these Amazon and B&H affiliate links to order your photo gear.
I also offer photography workshops and tutoring sessions. There are also video tutorials, which are online workshops on photography.
Join us on the Tangents Facebook group for further discussions.
Neil vN

Books by Neil van Niekerk

Hi Neil, I’ve recently purchased a similar video lighting setup, based much on your recommendations here. Do you find that the tension screw that keeps the head from pivoting stays put? If I bump the light or hold the handle at an angle where the head is cantilevered from the handle, the head easily pivots. I’m wondering if after time it becomes looser, or if the whole purpose of a tension screw is to keep it on the verge of easy adjustment. I’m thinking back on old tripod mounts and flash grips that almost required pliers to tighten down for use.
Phil, I have to agree – the way the head is tightened onto the stem / handle, isn’t the most elegant design. I too need to adjust the tension knob several times during a shoot.
Hello Neil, I’m a big fan of your work and follow your tips. I recently purchase some Lowel equipment at an auction. Got a hell of a deal. The equipment is as follows: 3x Tota light, 3x Omni-light, 3x DP light. Do you think I can get the same result as the ID Light in which you use as the equipment I have?
You would definitely be able to get the same results .. however, the kit you have consists of light stands and umbrellas as well. And this implies a more static approach.
The beauty of a video light or two, held up by an assistant, is that it is very portable. You can set something up, shoot, and then quickly move on.
There is an additional side-effect (and often a benefit), to the video lights being hand-held. Your assistant will purposely or inadvertently change position of the lights .. thereby changing the way the light falls on your subject .. frame by frame.
With a more static set-up you would gain more predictability, but also lose that serendipitiy factor of stumbling onto a specific way the light falls that just works beautifully. Unexpectedly so.
best
Neil vN
Hi Neil
I’ve just purchased a second hand Lowel ilight. I’ve tried using it during the daylight, but it doesn’t seem to have enough grunt to work. I’m guessing that it’s used to fill in shadows (when in open shade) or as a key light when it’s getting dark. Also, the light seems quite harsh on your subject’s eyes, but if I feather it, it doesn’t seem powerful enough to beof much use!!!!?
Warren, the light type you get from a video light will be fairly harsh. It certainly isn’t soft. But what we’re chasing here is the dramatic quality that this kind of light can give us. It needs specific attention to how you position the light. In comparison to that, using a softbox is much more forgiving.
Check this page for some advice on how I position the video light when doing portraits.
The video light certainly isn’t strong enough for use in daylight. You’d need something akin to a deer light to even make a difference in daylight.
With settings around 1/180 @ f2.8 @ 800 ISO … the video light is obviously for indoor or low-light use only.
I hope you settle into this … there’s some amazing work created with just a video light. : )
best
Neil vN
Excellent resources as usual! Thank you! A couple questions – Can that light fit on a typical light stand? And about how long does that battery last if the light is on full or almost full power?
Finally, for Neil or anyone else – any other video light recommendations for still photography? Thanks a million!!
Hi there .. The light does fit onto a lightstand, and screws into position.
The battery lasts about 15-20 minutes with continuous light. It doesn’t sound like much, but the way we use it for stills, it is enough. You just light your subject for short periods before setting up again.
I’m looking at reviewing some LED lights, and see how they stack up.
Hi Neil
You are a mine of information !
I have a couple of questions if you don’t mind. Do you use the Lowel diffuser much and the snoot at all?
What wattage of bulbs do you use ?
How far from the subject do you put the light (close as you can or a fixed distance)and do you use it mainly at full power.
I shoot weddings and I find Brides think the light is blinding them, it may be because I use it too close and too much power.
One last question, do you ever use two lights on a bride-one main light source and a second to soften the shadows on the face.
I live in Ireland and was wondering if you are coming over for a seminar at any stage. I would be first in line to buy my ticket!
Cheers Neil
Des
Rowan .. I have the diffuser disc, but it cuts down considerably on the power of the light, so I tend not to use it. I do use the barn-doors though to create interesting shapes to the way the light falls off.
I mostly use the light at full power, and hold it above my subject at about 6-8 feet away.
The light is very bright. Best is not to switch the light on and then lift the light up to height. Rather, hold the light above them, pointing up … switch the light on (still pointing it up), and then rotate your hand until the light shines on them. THis way, the light “rolls in” from above, and it isn’t this sudden sharp bright light in their eyes.
Also, it helps in how you pose them. THey don’t have to look at the camera or in the direction of the light. If the bride drops her gaze and snuggles in with the groom, the light from the video-light can look romantic and intimate.
For boudoir I often work with two lights, since I have them on light-stands .. and have the time to adjust them. With the romantic portraits at a wedding, the tempo is usually quite fast, and then I work with just one light. Simplicity is easier then.
Ireland workshop in 2011 .. it’s a near-definite. Subscribe to the email list to be kept up to date.
thanks
Neil vN
Hi Neil,
I love your blog and the information you give.
Please, tell me, to have a narrow/spot beam of light, is it enough the barndoors or do you have to use the snoot?
Thank you!
Also, between Lowel ID Light NiMH Kit, Cigarette Lighter Connector and XLR connector, which one do you recomand? Thank’s
The Lowell ID-light can be focused to an extent. (See the comparative review for example shots of the difference between wide & tight.) The barn doors are also quite effective in controlling the light spill. So personally, I wouldn’t bother with a snoot for this.
I have the version with the XLR connection. I’m sure the one with the cigarette lighter connector has it’s uses, but I don’t need it.
Neil vN
Can you provide some links to where you use the MicroPro ?
I am trying it out and love to see how it is used by others.
Thanks
Just to follow up on my last message, I mean another link on your site other than the review of the MicroPro. Thanks
William, the links mentioned on the main post, should have more examples scattered in there.
Here are three specific posts showing work with the Litepanels:
– romantic wedding portraits with video light
– lighting ideas for the romantic wedding portraits
– positioning the handheld video light
Neil vN
Hi Neil
If you had to chose just one between the ‘lowel id’ and the ‘MicroPro’which would you choose and why?
Tony … I would choose the LitePanels over the ID-light. Even though it has less light, it runs for longer, and doesn’t become hot, and is more compact.
Neil vN
Hi Neil, thanks for that, it’s very useful to know your view as I thinking of purchasing one or the other. I have used the ID light and I love the results but they are heavy and awkward to carry. How much is the difference in power between the two? if say you were running the Lowel on a 50 watt bulb?
Just as a matter of interest five minutes ago I saw an ID light sell on eBay, over here in the UK, for £400 (second hand) which is increadible when you can but them new for £365
And here it is:
a comparative review between the Lowel ID-light & Litepanels MicroPro & Dedo Ledzilla.
Neil vN
I have several different LED video lights including the Lightpanel and the Fancier 126 light. The Lightpanel is about $300 and the Fancier is about $60. In terms of the quantity of light output they are about the same. But in terms of quality of light and color balance of the light, the Lightpanel wins, hands down. I’ve been frustrated lately with the green color caste of the Fancier light. When I am working in B&W it doesn’t really matter, but for color work, the Lightpanel is much better.
Hi Neil
Your advice on this site has been incredibly helpful. I found your site 2 days ago and have barely left the screen since! I think this has to be the best site out there. Can I please ask your advice on my dilemma…. I have had lots of requests to shoot boudoir and burlesque… but having read all your advice and looked at all your shots I’m still not sure which is the best to go for Lightpanel or the Lowel ID… I want those beautifully lit, dramatic shots, as simple as possible so I can concentrate on the model. I’m leaning towards lightpanel based on the short battery life of the Lowel…. many thanks…
Hi,
I have seen lowel id lights in the states much cheaper my question is, would they work over here in the UK as regard voltage etc….
Shane,
The Lowel ID lights run on battery, so voltage is not a concern as they are normal 12 volt battery operated.
I am in Australia and I got 2 Lowel IDs out of B&H far cheaper than here in Oz, but I did not get the battery from them, I went down to a motorcycle place, bought a motorcycle 12v sealed battery and it lasts for over an hour or more, have not actually tested it running full, since it does a full wedding for me on the one battery.
Even bought a battery nylon case which zips up, just leaving the XLR connector sticking out, neat and tidy. Heavier than others you buy but far more durable and longer lasting. I have 2 batteries and they are over 3 years old, still run strong.
You also need to purchase the male XLR connector to fit into the one supplied as the other end of this is what I connect to the battery with the push on clips onto the battery terminals.
Also purchased the special charger locally here to charge them.
https://www.master-instruments.com.au/products/57802/BFA012.html
Trev.
I somehow stumbled upon your website and just wanted to say how much I am so grateful that I have. Such a great plethora of information and it’s all so well organized.. and it all makes sense! I’ve always had such a fear of lighting – basically because I don’t know how to use it well enough. But your site and the information you’ve put forth will definitely help me with my issues and will broaden my horizon. I will be studying and practicing from it for the next several days. Thank you thank you thank you!!!
Being a videographer , filmmaker for years this works well for me , so will try using it for my next photo shoots. The light I have used after many that I like the most is the Torch LED by Switronix. It is adjustable between 3200/5600k and is very powerful, I have two of these and even use them for interviews . Thanks for the tips on angles etc. My first time on the blog, have two of your books on Photo Lighting.
Hi Neil
Great article and your blog is source of useful and inspirational information.
I have been recently interested of using LED lights and saw product from Rotolight
It will produce approx 1000 lux at 1meter.
What is your experience of minimum power for single person portraits ? Any other LED light would you recommend?
Thank you
Jouni from Down Under
Jouni … I had a look now at that link and the specs of the Rotolight Neo – it is quite powerful! Also important is that its CRI > 95. This means you’d get great skin tones from it.
The price isn’t bad at all for the specs. It’s about as good as it gets, imho (without having actually touched one.)