Flash Photography Techniques
Flash brackets ~ Off-camera flash ~ Flash photography basics
![]()
Off-camera flash photography
The preceding pages mostly deal with how to use an on-camera speedlight to get ‘prettier’ light. And where we can, how to seamlessly blend our flash with our available light. However, where flash becomes a lot more controllable and perhaps more interesting, is when you move your flash off-camera.
Off-camera flash is quite an extensive topic. Instead of trying to cover it all in just one article here, this page will serve as a jump-page to several of the important articles on the Tangents blog where the topic is specifically off-camera lighting. Most of the links deal with off-camera flash using speedlites, but there are a few articles where larger flashes are used. The same thought-process is in play though. (Here is the link if you want a list of all the articles about off-camera flash on this website.)
So why would we want to use off-camera flash? The answer is refreshingly straight-forward. With off-camera lighting, we have greater control over the direction and the quality of our light. And that is it in a nutshell. Control. So let’s delve deeper into it:
Off-camera flash photography – the techniques
1.) Balancing flash with ambient light – where do we even start?
My starting point with on-location portraits is most often is a combination of: finding an interesting or neutral background; and positioning my subject so that they are placed in front of / in relation to the background so that it all looks visually pleasing. And then balancing the exposures for my background and my subject.
This article is a good overview to start us off on this topic. The easiest approach when working in fairly flat and even ambient light, is to under-expose the ambient light by a certain amount. Then we add flash for correct exposure. But we often have scenarios which aren’t as simple. Here are easy-to-follow explanations of how we’d go about getting to balancing flash and the ambient light.
Related articles:
- Balancing flash with ambient light – where do we even start? (model: Anelisa)
- Flash photography tutorial – balancing flash and ambient (model: Camille)
- Tutorial: balancing flash with ambient exposure (model: Tia)
- Various scenarios: balancing flash with ambient light (model: Catherine)
- Controlling bright daylight w/ direct off-camera flash (model: Molly K)
2.) The techie stuff we absolutely need to know!
There are some technical things we need to be familiar with to be able to really get a grasp on flash photography. There’s unfortunately no way around this. If you’re not au fait with how your camera’s shutter works and how the focal plane shutter affects flash exposure, then you’ll always be grasping and guessing. Here are a few articles that covers the essential topics – maximum flash sync speed; high-speed flash sync (HSS); and the use of Neutral Density filters as an alternate to getting wide apertures with flash. Then, while it might seem archaic, it is also very useful to have a handle on how the guide number of your flash helps you.
When we work outdoors in bright light, it is essential that we understand what is happening at our maximum flash sync setting, and why it is a sweet spot when you use flash in bright light.
High-speed flash sync allows us a wider aperture, but there are certain implications – our flash power drops. This may or may not be an issue, depending on how bright the available light is that we’re shooting in.
So these are the type of techie stuff we need to know. But I promise, it is more fun and more interesting than you might suspect. Hang in there, and go through these articles. They will help you!
Related articles:
- Tutorial: maximum flash sync speed
- Tutorial: high-speed flash sync
- Using a neutral density (ND) filter to control DoF with flash (model: Ulorin Vex)
- Using a neutral density (ND) filter with flash (model: Anelisa)
- Flash photography: applying the Sunny 16 rule and the flash Guide Number

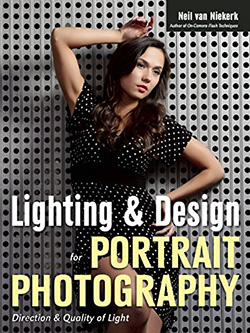
Direction & Quality of Light
I wanted to distill the essence of what we, as photographers, work with – light! Before we can truly grasp on-camera flash and off-camera flash, and really, any kind of photography, we have to be aware of the direction and quality of light. We need to observe the light that we have, and then decide how best to use it, or enhance it.
With this book, I try my best to share those “aha!” moments with you, and I do believe this book can make a difference to your photography.
The book is available on Amazon USA and Amazon UK, or can be ordered through Barnes & Nobles and other bookstores. The book is also available on the Apple iBook Store, as well as Amazon Kindle.
3.) Camera settings & flash settings
What are your settings? – a question that I am often asked about various images. And quite often, the answer is surprising – it doesn’t really matter. Sometimes the specific settings are of importance, but usually much less so than the method of getting to correct exposure of the ambient light and the flash.
I can’t stress this point enough – the thought-process is more important than the specific numerical values of our settings. That the aperture was at f/3.2 for example, is most often a trivial consideration. Our thought-process or algorithm we use, is the key to getting successful and consistent results with off-camera flash.
Related articles:
- Off-camera flash photography: what are your camera settings?
- camera & flash settings: what do you want to achieve? (model: Ulorin Vex)
- A first-steps guide to using a light meter with manual flash (model: Elle)
- Practical tutorial: controls for manual flash exposure (model: Hannah)
- Off-camera flash for that extra bit of drama (model: Olena)
4.) Overpowering the sun with flash
One of the most challenging scenarios would be to photograph in bright sunlight. A challenge for sure – but if you keep to a methodical algorithm, then it becomes much more controlled and easier.
Usually when people say they want to over-power the sun, they mean that they want to match the sunlight with flash. They want to lift the shadows to a better exposure where details aren’t lost.
The information in the linked tutorials here are also covered directly and indirectly in the preceding articles listed above. There is a specific thought-process here that gets us out of trouble every time, and gives us consistent results when using flash on a sunny day. So if you have worked through the other tutorials and articles listed above, you’ll have an easy understanding of what you need to do.
Related articles:
- Overpowering the sun with off-camera flash – what are my settings?
- Overpowering hard sunlight with flash (model: Johannie)
- Getting the most power from your flash / speedlite / speedlight (model: Shawna)
- Flash photography: overpowering the sun with flash (models: Sarah & Mark)
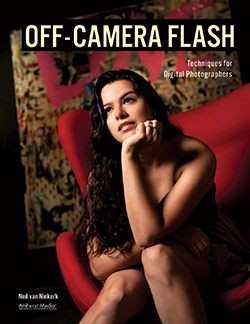
Off-Camera Flash Photography
With this book, I wanted the material in the book to flow as a truly accessible introduction to off-camera flash. The techniques here are within the reach of everyone.
As always, the aim was for those aha! moments when things become clear and just makes sense. And then, hopefully, inspire the readers of the book to see how easily off-camera flash lighting can expand our photographic repertoire.
You can either purchase a copy via Amazon USA or Amazon UK. The book is available on the Apple iBook Store, and Amazon Kindle.
5.) Off-camera flash – the gear
Most of the tutorials and articles on this website is about technique. The way we do things, rather than being equipment-centric. My feeling is that if you understand what you need to do, then the specific equipment matters less.
That said, here are a few articles which mostly concentrate on simple lighting setups using speedlights. Getting great results is within the reach of everyone!
Related articles:
- Gear list – Starting out with off-camera flash
- A two-speedlight setup for photographing the wedding formals
- A simple lighting setup for home studio photography (models: Anelisa & Aleona)
- Thoughts on using a beauty dish (light modifier) (David / Anelisa)
- Home studio – portrait lighting setup in limited space (model: Kaylex)
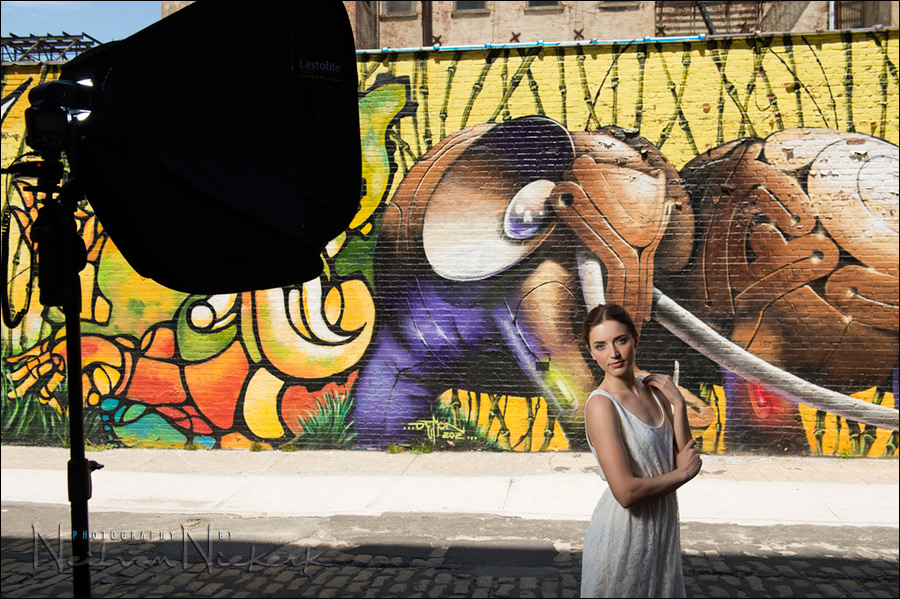
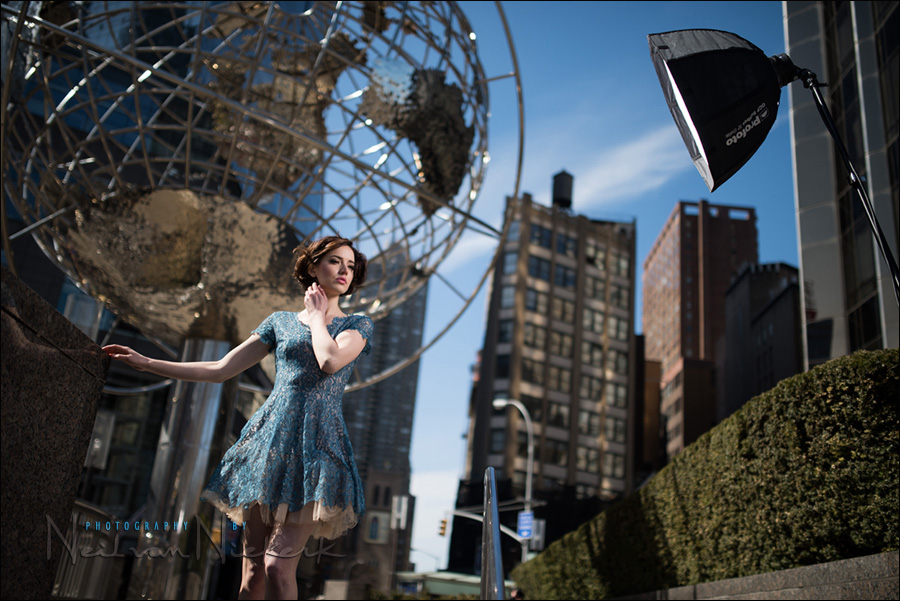
6.) Positioning your off-camera flash (and softbox)
A good, conservative placement of a softbox is generally around 30 degree from the camera; at a height where the light is about 30 degrees (or slightly less) above your subject’s head. We want that ‘cone of light’ coming from the softbox to hit your subject’s head & shoulders. In other words, you need to aim the softbox at their upper body and head .. and specifically with that ‘sweet spot’ of the light coming from the softbox, having to point at their face.
This is a safe way to place the light for results that will look good. Of course, from there on we can experiment, depending on how we pose our subjects, and also depending on what we want to achieve.
Related articles:
- Short lighting vs. broad lighting (model: Anelisa)
- Distance between softbox and subject (model: Adrienna)
- Feathering the light
- Positioning the softbox
- Distance & exposure metering for manual flash and softbox (model: Valerie)
7.) Interesting photo sessions with off-camera flash
For further reading, here is a selection of blog articles describing photo shoots where off-camera flash was integral in the final look of the photos.
Related articles:
- Various photo sessions with The Modern Gypsies
- Using flash at a fireworks display
- Off-camera flash – bringing sparkle on a rainy day
- Flash photography: recreating Hollywood Glamor style portraits
- Environmental portraits – speedway racer
- Photographing a vintage motorbike on location, with Profoto lighting
- Multiple off-camera flash – gelling your flash for effect (model: Bethany)
- Portrait session – Steinway pianist
 next section: Flash photography basics
Help support this website
If you find these articles of value, please support this website by using these Amazon and B&H affiliate links to order your photo gear.
I also offer photography workshops and tutoring sessions. There are also video tutorials, which are online workshops on photography.
Join us on the Tangents Facebook group for further discussions.
Neil vN
Books by Neil van Niekerk

This page will be bookmarked, devoured and hit up so many times, NeIl. Thanks for bringing it all together so nicely. Bravo!
So under normal conditions, I can handle this, but when it comes to exposing for off camera on less than easy conditions, here is my question:
I was practicing some techniques yesterday and I was setting the exposure using Ap. mode for the ambient light. I set the Ap that I wanted, but this told me that under those conditions, the speed was about 3 seconds. My Ap was f8, ISO 100. No problem to add a flash, but what should I then set my speed to in Manual? What if the subject is moving or it’s windy? Do I just automatically bump it up to 1/60 or so? Or should I up the ISO and get some kind of manageable speed before I start setting the flash? Should I be using P mode to get a reading?
This is sort of a general technique question…
Like I said, under a little more daylight, I get it, but I’m not sure under REALLY low light how I should do this.
Thanks for the help.
Hi there Robb ..
You can set your shutter speed to anything up to max sync speed. You can only go over max sync speed if you use high-speed sync flash .. but then you lose a lot of power. So ideally, stay at max sync speed or anywhere lower.
This freedom seems to confuse newer photographers – the idea that “you can do anything”, or set your camera to any shutter speed.
But you choose your shutter speed (and your aperture and ISO) based on how much available light you want to allow in. That flash to ambient light ratio.
I wouldn’t just go for 1/60th as a default. This thing about 1/60th being a good shutter speed is an erroneous belief that at 1/60th we automatically have a hand-holdable shutter speed. I often go slower, but usually higher. I get sharper images. However, I do want my ambient light to register.
So we come back to metering then …
The best I can suggest is to go through this article … flash & ambient light – where do I even start?
No need to go to Aperture Priority or Program mode to enter those settings into your camera. It quite often doesn’t even make sense … since we need to meter selectively for our background and / or our subject. Use your camera’s built-in metering display.
One thing to be quite aware of, is that often we have two broad areas of ambient light in our background – the much brighter sky, and the ground / urban area. The sky is usually much brighter, and you can’t expose correctly for both those areas. So you need to make the decision as to which you want to expose correctly for .. and very important … frame your image so that your subject is positioned in an interesting way against either of those two choices of background.
Thanks tons. That’s helpful. I’ve been reading all of the lighting techniques on your collection Tangent and in the planning stage of some night shots, so I’ve been trying to practice. Next thing to do: buy your book….
A big fan.
Robb
Thanks for another excellent tutorial! Can you please explain or share how do you make your pictures “pop”, vivid and very sharp? Do you normaly enchanse it in the adobe photoshop or these are originals?
Thanks very much in advance!
Greg
Greg … I’ve posted a few article on making images pop.
Here are the first two – article 1 / article 2
I’ll tag future articles under the Digital Imaging category, so check back in over time.
Neil,
I found your blog a couple of days ago and am absolutely addicted. Every single post is thorough, complete, and extremely informative. I especially love the articles about flash photography. I’ve read a lot of articles on flash photography elsewhere, especially off-camera flash, but none have come close to the clarity of your articles. Thank you for sharing this great information with us all.
Hi Neil,
With my Nikon D90 I have found that the SB-900 flash can be fired with the built-in camera flash, even with the signal line obstructed for up to two stone walls, according to tests I’ve done, where I placed the flash at about 30 feet from the camera. I’m thinking of buying the Nikon D700 and want to know if the built-in flash of this camera act the same way, which for me would be helpful.
Alfredo.
Yes, it would work exactly the same way with the D700.
Greetings Neil
Can you please assist me with the following question about off camera flash, and more so RATIO’s and FEC.
At present, I am shooting with a 1DSMK3, 5DMK2, 2 x 580EXII (one in a soft box and the other in an umbrella) with the STE2 as the master.
I am a little lost in the set up but believe the below scenario is the same.
I set up my two 580 as slaves, the first as A (main) and the second as B (fill/hair etc).
Now, I can either use the ratio button on the STE2 for different outputs OR
I can manually adjust the FEC on each 580.
The advantage of the ratio button is when working alone, I can do this from the STE2 and not run around like a chicken with my head cut off.
Essentially, is it the same principal either way. This being, the ability to adjust the ratio from the STE2 or manually from each 580.
Regards
Angelo (Australia)
Angelo .. you have it right there. That should work with the ST-E2 like you describe it.
Hi neil,
wow as in wow…learning so much in your tutorial. gaining more knowledge about how to use flash off-camera.
My question is and it makes me think about it and i hope you can still response to this is that how am i gonna set my flash to ttl mode if i am off camera? i know pocket wizard has this with ttl. but how lets say i cant afford or i dont have a pocket wizard which offer the ttl mode in off camera? Which or how am i gonna do the ttl mode? Well for sure for me i will be goin for manual flash mode but i also want to experience the fast and ease of use of ttl.
Hope to hear from you soon.
Oppps by the way i love coming back on all your article..love it and thanks a lot for all your article. it helps me a lot and i know a lot of newbies also gaining from it…keep it up
Hi Neil,
I’m afraid that I’m only going to repeat what everyone else has said, but sincere thanks to you for your unbelieveable articles. I came across your by accident yesterday and have since just about read every article you have written. It is helping me understand so much more about this new passionate hobby. I’m grateful to you for unselfishly sharing your knowledge. You will hear from me again I assure you and hope that you continue to educate us.
Ted A
Thank you Neil.
It is amazing how you can improve the quality of a photograph with just a small strobe off camera. I would love to show you some of my snaps. Do you have a readers gallery?
Andy,
There is a Tangents Forum [you just need to apply for free membership] here:
https://neilvn.com/forum/
and this is the thread where to post your work
https://neilvn.com/forum/discussion/869/post-your-photography-work-gallery-website-portfolio#Item_52
I have purchased several books of your and found them very helpful….I was curious about one thing that is not really talked about much and the is the zoom setting of the flash. I am presuming that you set it pretty wide when you are using a softbox. What is your typical native zoom setting on your flash? 35mm? Do you ever flip the cover and go to 17mm?
Patrick … Without having done proper comparative testing, I would say any wide-ish zoom setting around 28mm would work very well. The flip-over cover would most likely cut down too much light, for no extra advantage.
Neil, i’ve been using manual radio (pocket wizards) the past 2 years and want to try the TTL radio instead hoping it’ll be a bit easier by not running back and forth changing the manual setting on the flash unit.
I read though that at least with Canon, the lens reads the TTL pre-flash as though it were ON the camera. So, if i were using an off camera flash say 7 feet from subject, and my camera is 20 feet away, it’s not going to register the correct flash reading (all based on distance). Is that true? That really complicates things now!
Pat
With TTL flash photography, the distance doesn’t play as much of a role as it would with manual flash.
While the distance is apparently taken into account with the TTL metering algorithms, it isn’t the dominant factor in how the camera determines correct TTL flash exposure.
How TTL flash really works – it measures the strength of the pre-flash, and from that the camera figures out how much light you need. So if your subject is at a different distance from the light than from the camera, it should work very well. What does influence the accuracy of the TTL metering, is how large your subject is in the frame. That has a much bigger influence than distance.
Seu site é um verdadeiro curso de fotografia super avançado… estou muito feliz por ter encontrado ele… juntamente com um livro seu que comprei, tenho aprendido mais do que se frequentasse muitos cursos… obrigado por compartilhar seu conhecimento de forma tão altruísta e magnífica. Com certeza sou um profissional melhor depois de conhecê-lo.
¡Muchas gracias por las amables palabras!